To add an image to your page you will want to follow these steps
1. In the editor click on the image icon, looks like a mountain and a sun (See Screenshot)

2. Once you click there you will receive a pop up for you to insert your image.
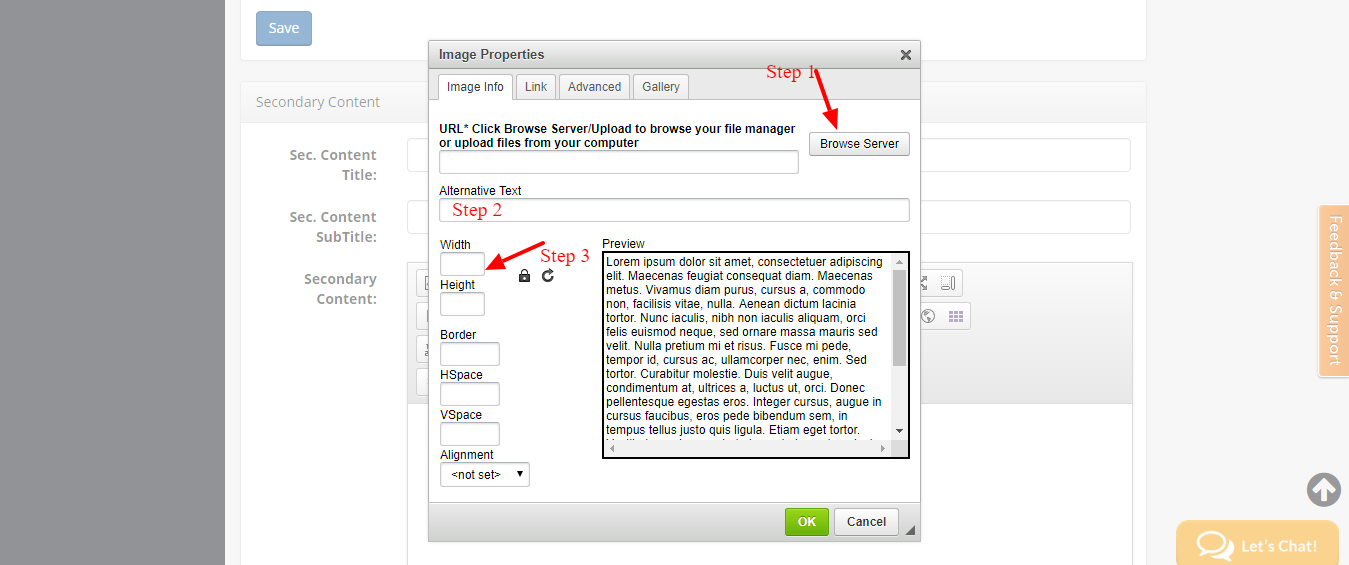
Step 1. Click on the browse server, and here you can select and image you have in your file manager, or in the top left corner you can add a file from your computer.
Step 2. Add Alternative text. This is required to save the image. Alternative text is the text that describes the image for those that are visually impaired and to be ADA Compliant.
Step 3. Enter in a height for your image. You want the lock to always be unlocked and the width to be empty (This allows the image to scale correctly on mobile devices)
You can add a border or if you are going to align the text to the left or right of an image you would want to add a 5 in the HSpace and the VSpace.
3. Click ok and that image will show on your page.
Comments
Please Sign in to leave a comment if you don't see the comment box below.