The Setting up Google Drive Integration
**NOTE**
-
You are not able to upload files/folders that you do not have write/edit permissions too
-
Working on the auto sync option - currently, if you update a file in Google Drive and you want those changes to reflect on the file in the CMS, you will need to re-upload that file for the changes to show.
-
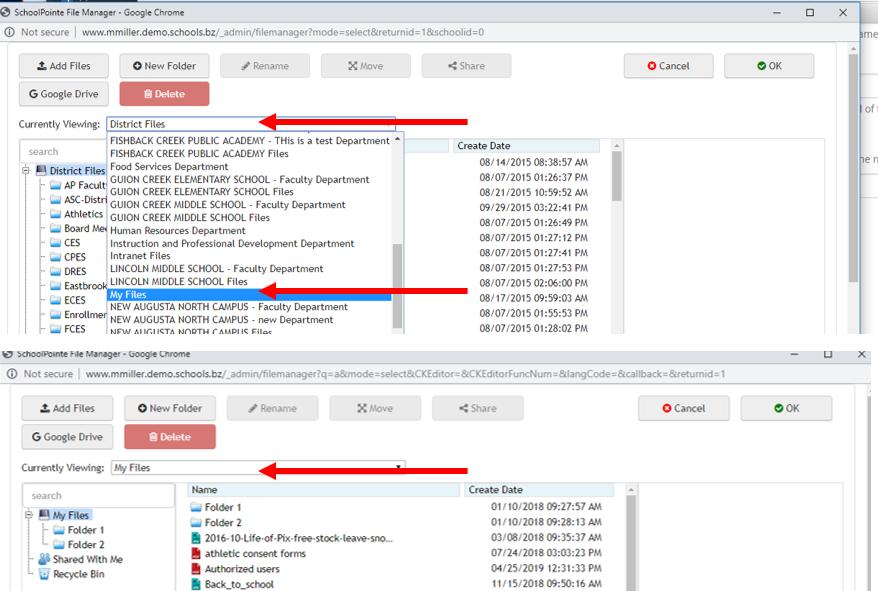
All files uploaded into the file manager from your Google drive will automatically upload into your My FIle folder within the file manager. Ex: If you are uploading a file into your header gallery, the folder that system defaults to is the building folder. You will have to find the uploaded file by changing the group folder to your my file folder.
Getting set up
Click here: https://console.developers.google.com/
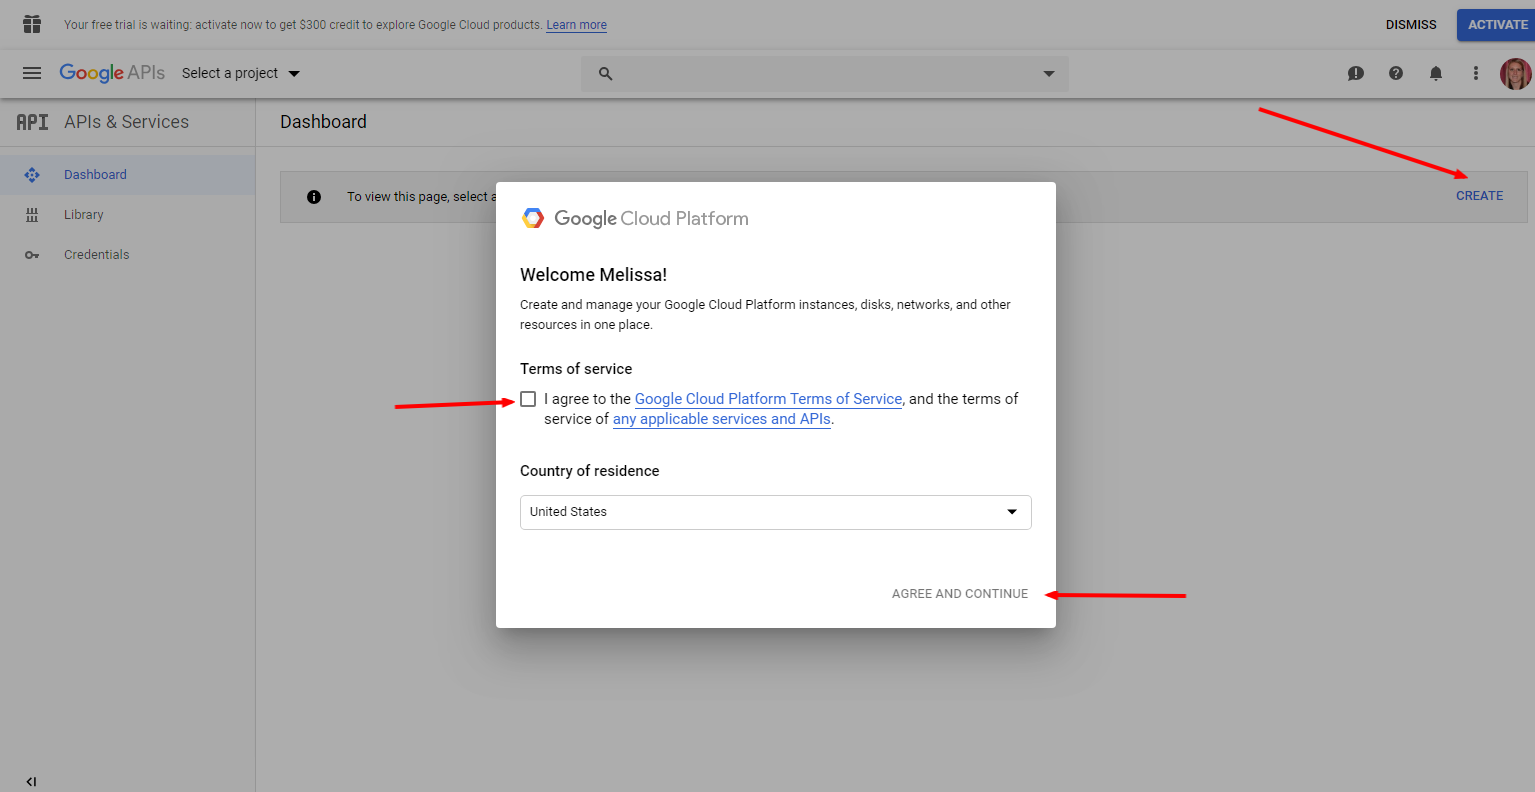
On the left side of the screen you will see a create button: Click create. A new window will open
Setting the API Key
Provide the project this name -> Schoolpointe API → Click Create. Agree to the Terms of Service and click Agree and Continue
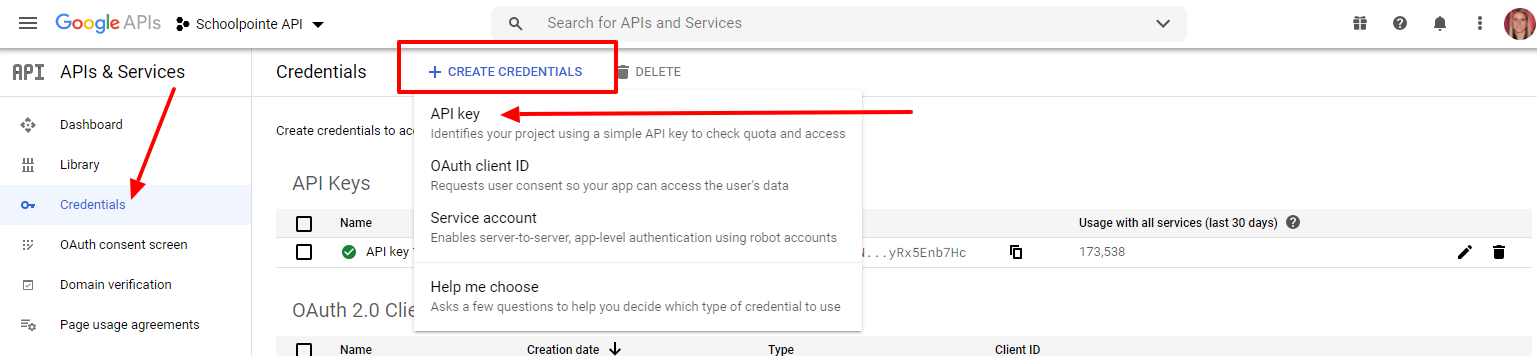
You will see a pop up window that says you do not have any API’s set up. That is fine, on the left of the screen you will see Credentials. Click Credentials --> select Create Credentials --> select API Key.
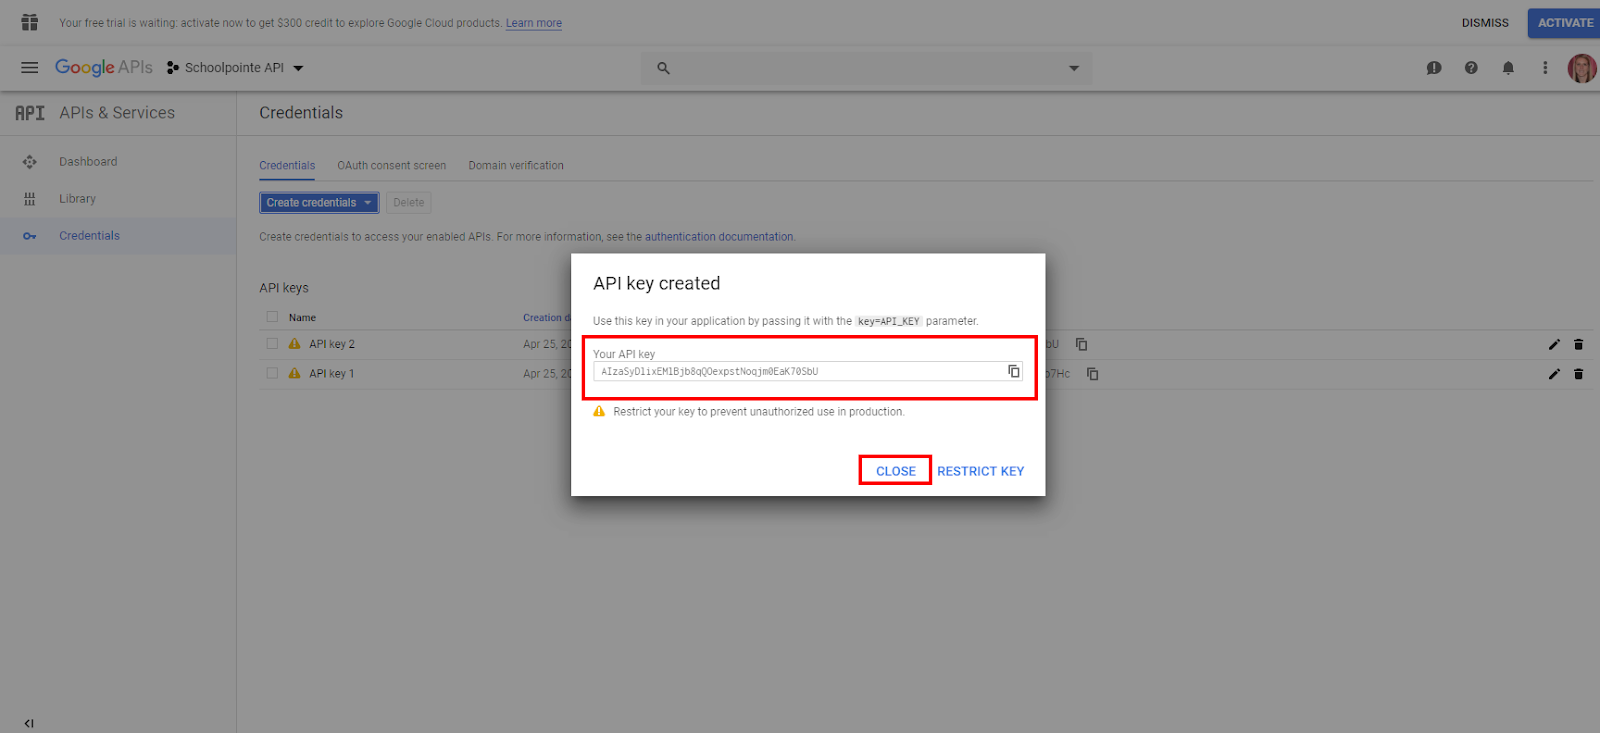
Copy your API Key to a safe location
Select Close (NOT restrict key)
Once the API is created, click on the edit pencil next to the API key 1
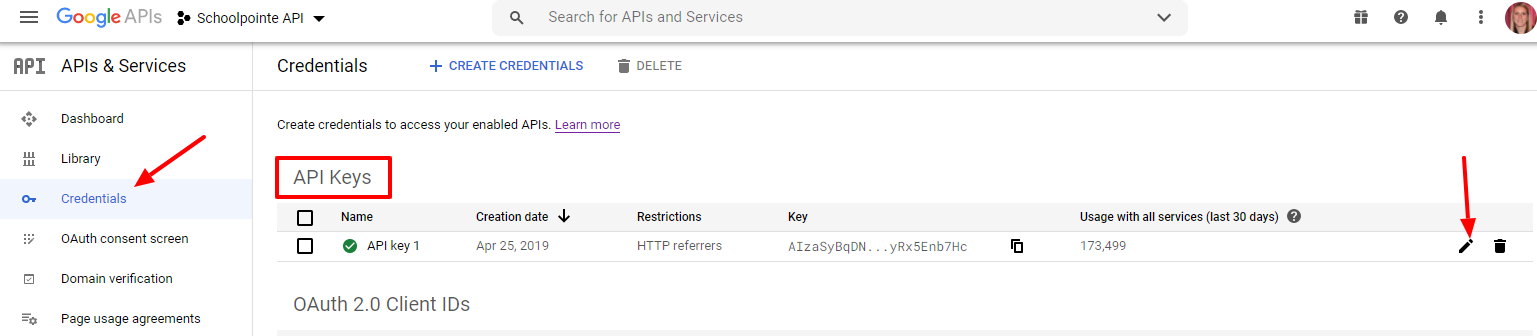
Check the HTTP referrers (web sites) box under Application Restrictions.
Under Website Restrictions add all of your authorized domains, including your schools.xx.bz website (contact support if you are not sure what your .bz website is - support@schoolpointe.com). The domains should contain the http(s)://
Check the Don’t restrict key under API Restrictions
Click Save
Setting OAuth Client ID
Make sure you are on the credentials page
Click Create Credentials
Select OAuth Client ID
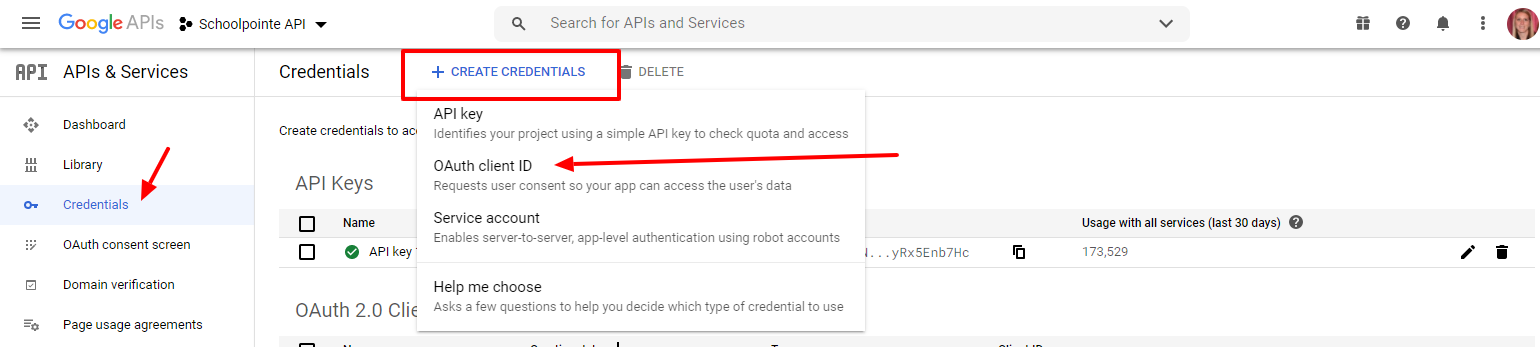
For the Application Type drop down, select Web Application.
Fill in:
Application Name - name it-> Schoolpointe API
Please add all of your authorized domains, including your .bz site, under both the Authorized JavaScript origins and the Authorized redirects URI’s. Include the http(s):// along with the domain name: https://domain.name.com
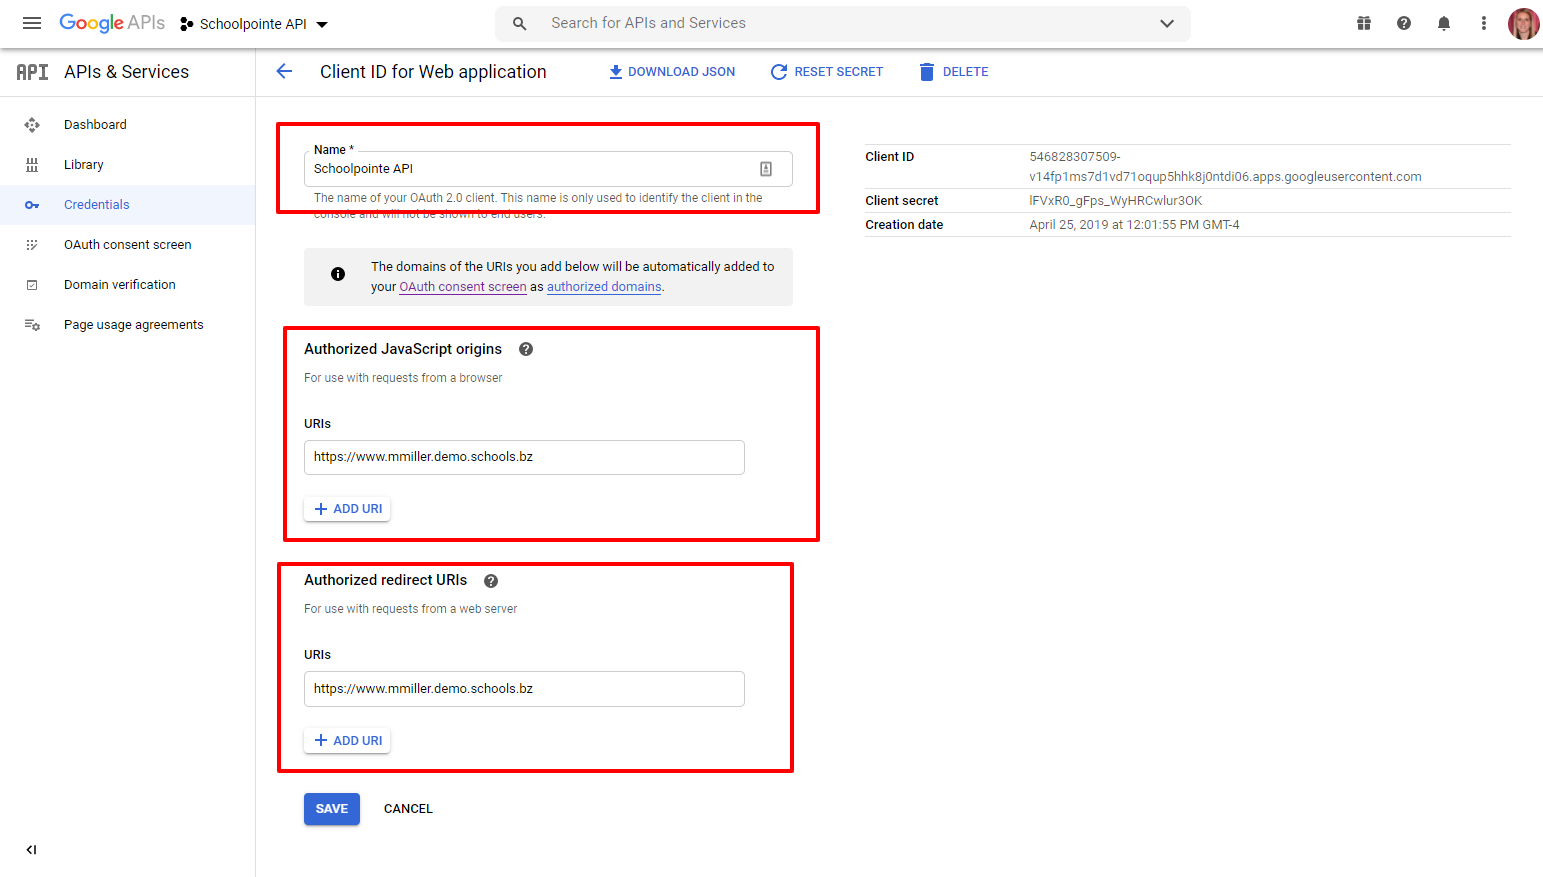
Click Create, and copy the ClientID and save these credentials to a safe location.
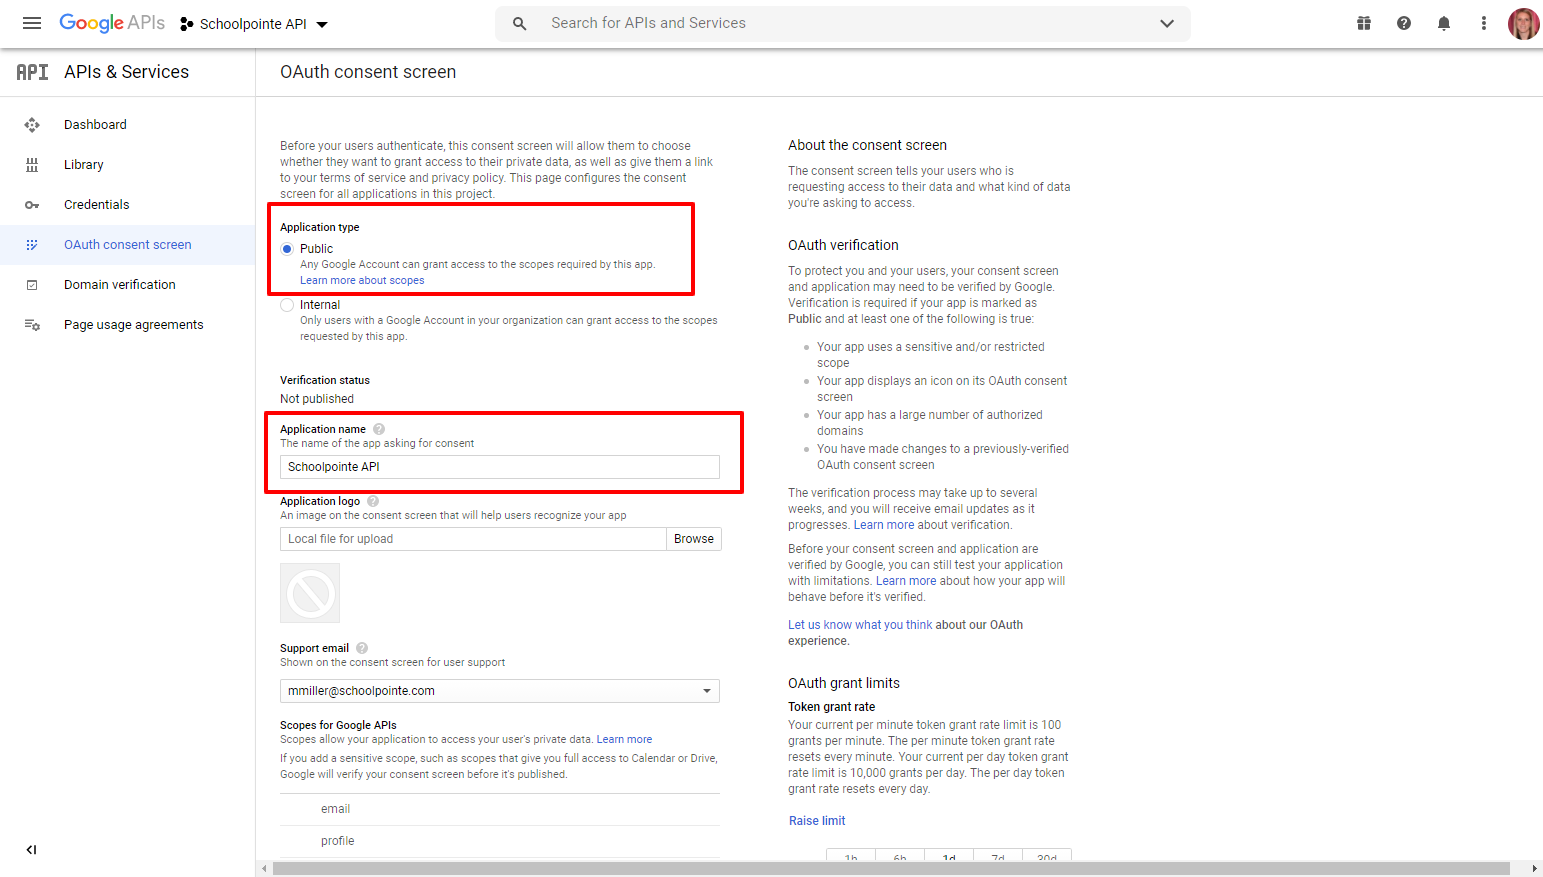
On the left, click OAuth Consent Screen and select the Edit App link.
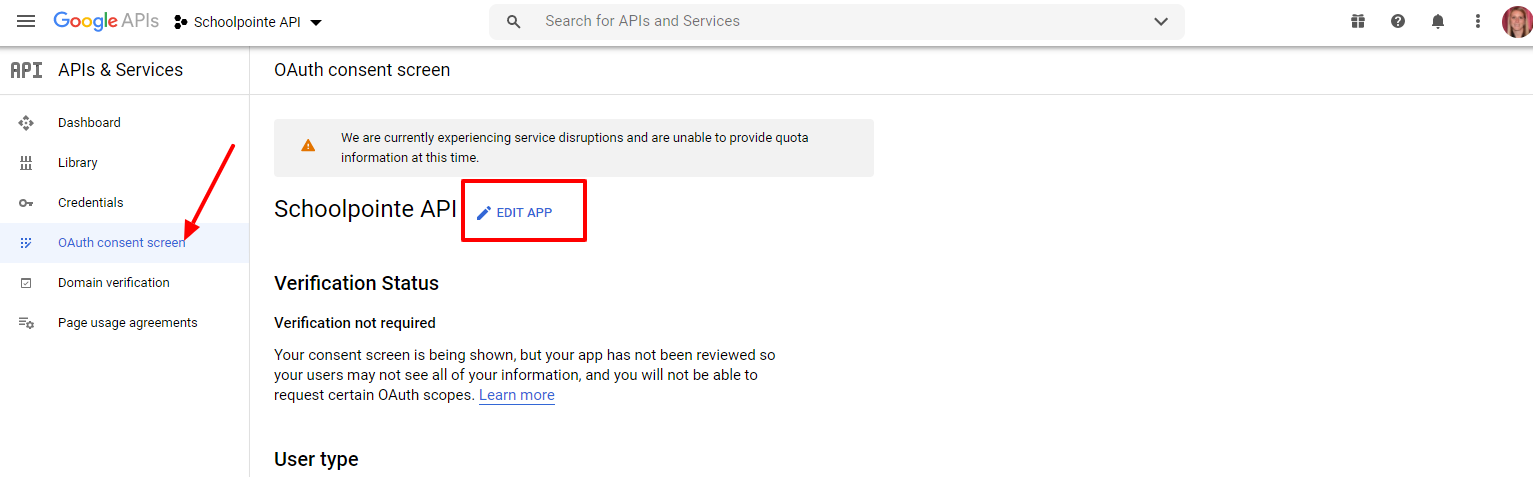
On this screen, make sure the Public box is checked.
Application name should read Schoolpointe API
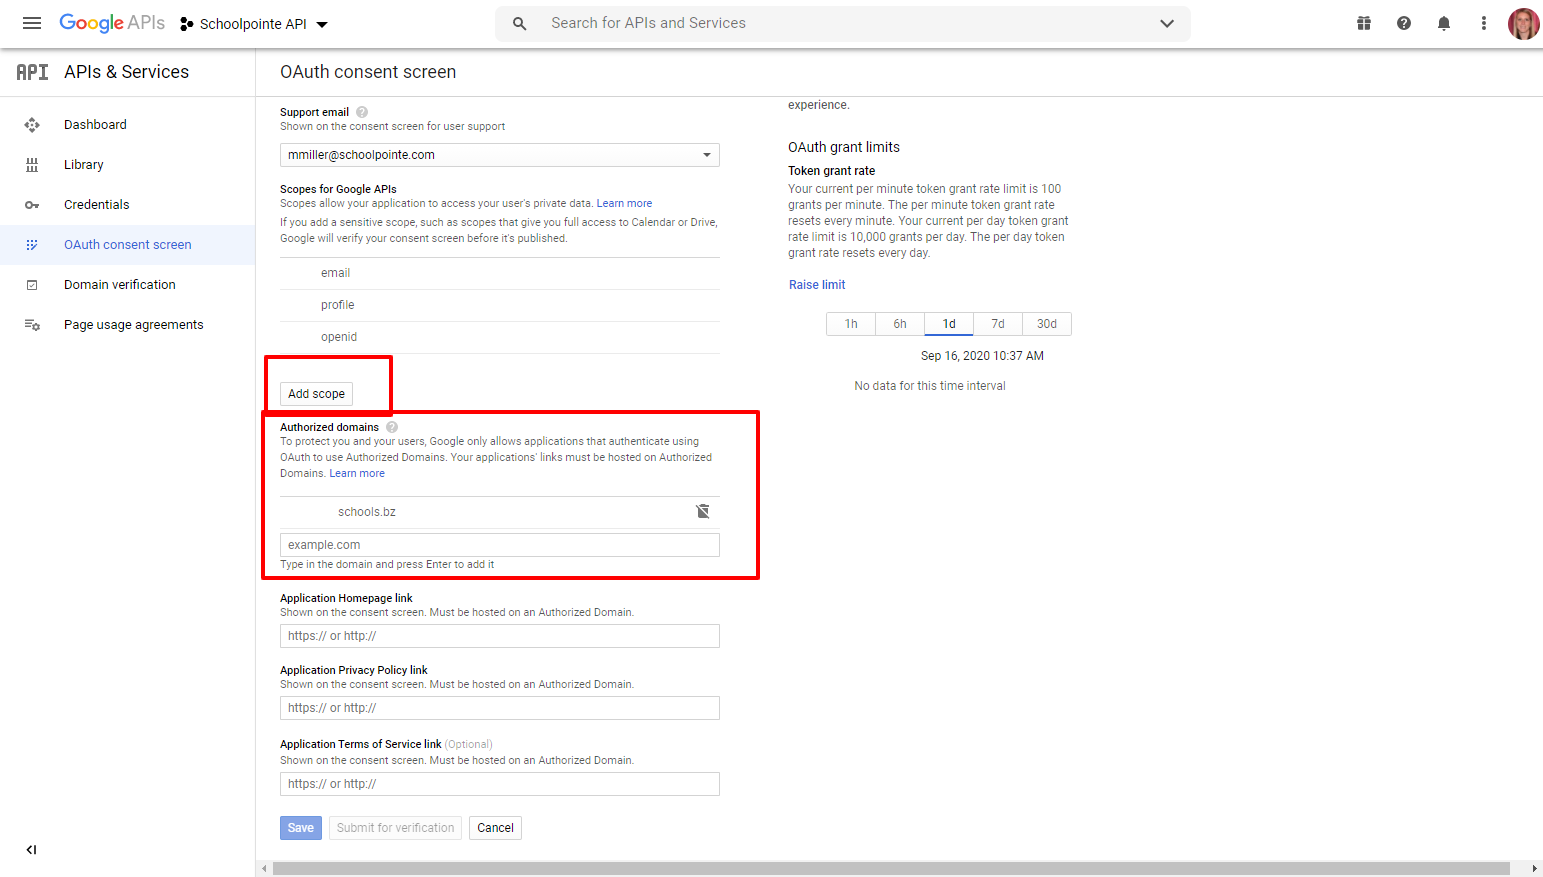
Scroll down until you see Authorized domains, add all of your domains (including your schools.xx.bz site) here. **They will ask you to remove the protocol here, so remove the http(s)://.
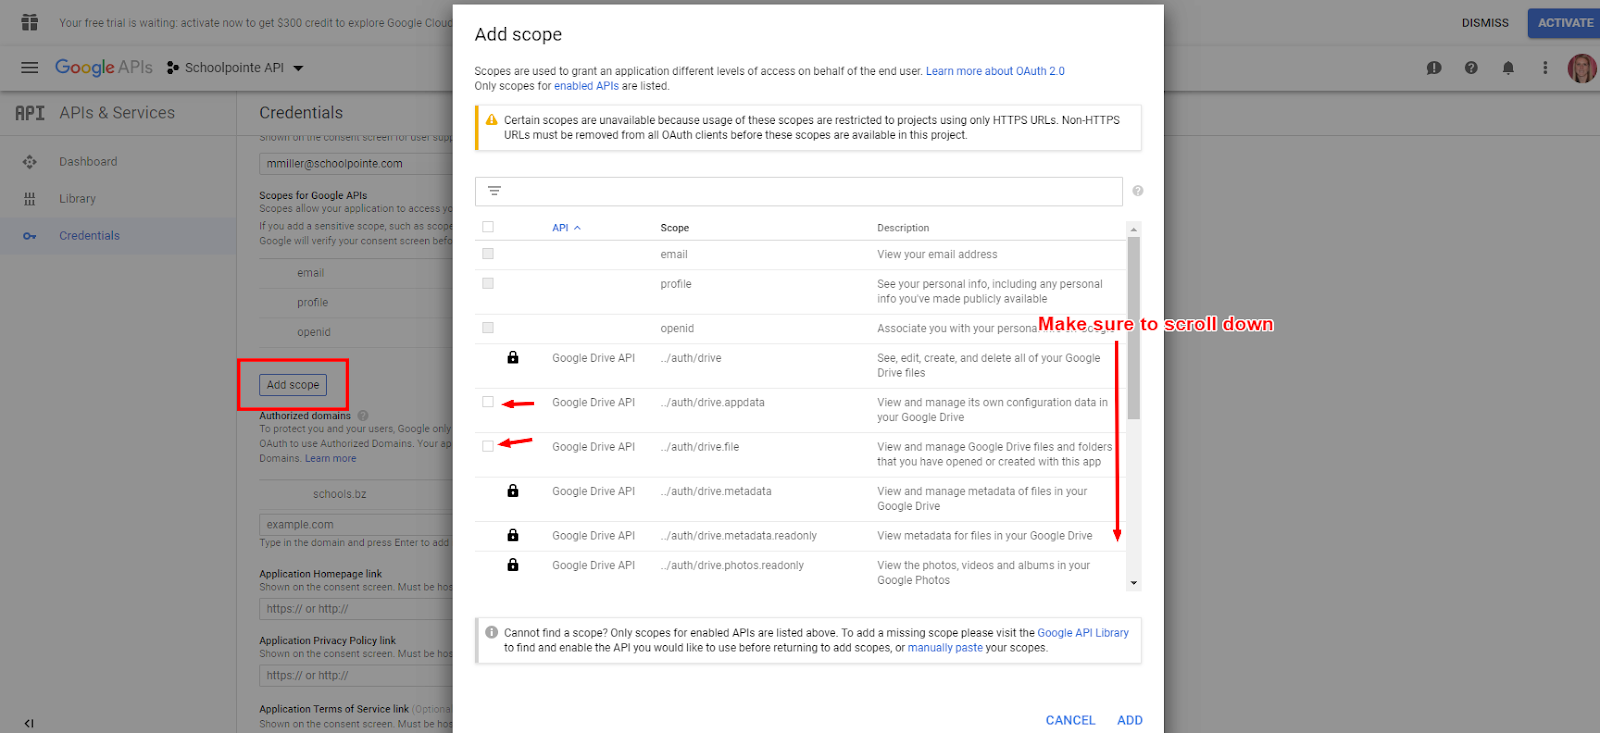
Before you click Save, there is an Add Scope button. Click this button.
Please check all Google Drive API and Google Calendar API scopes (skip over the ones that have locks next to them), click save.
Enable API’s & Services
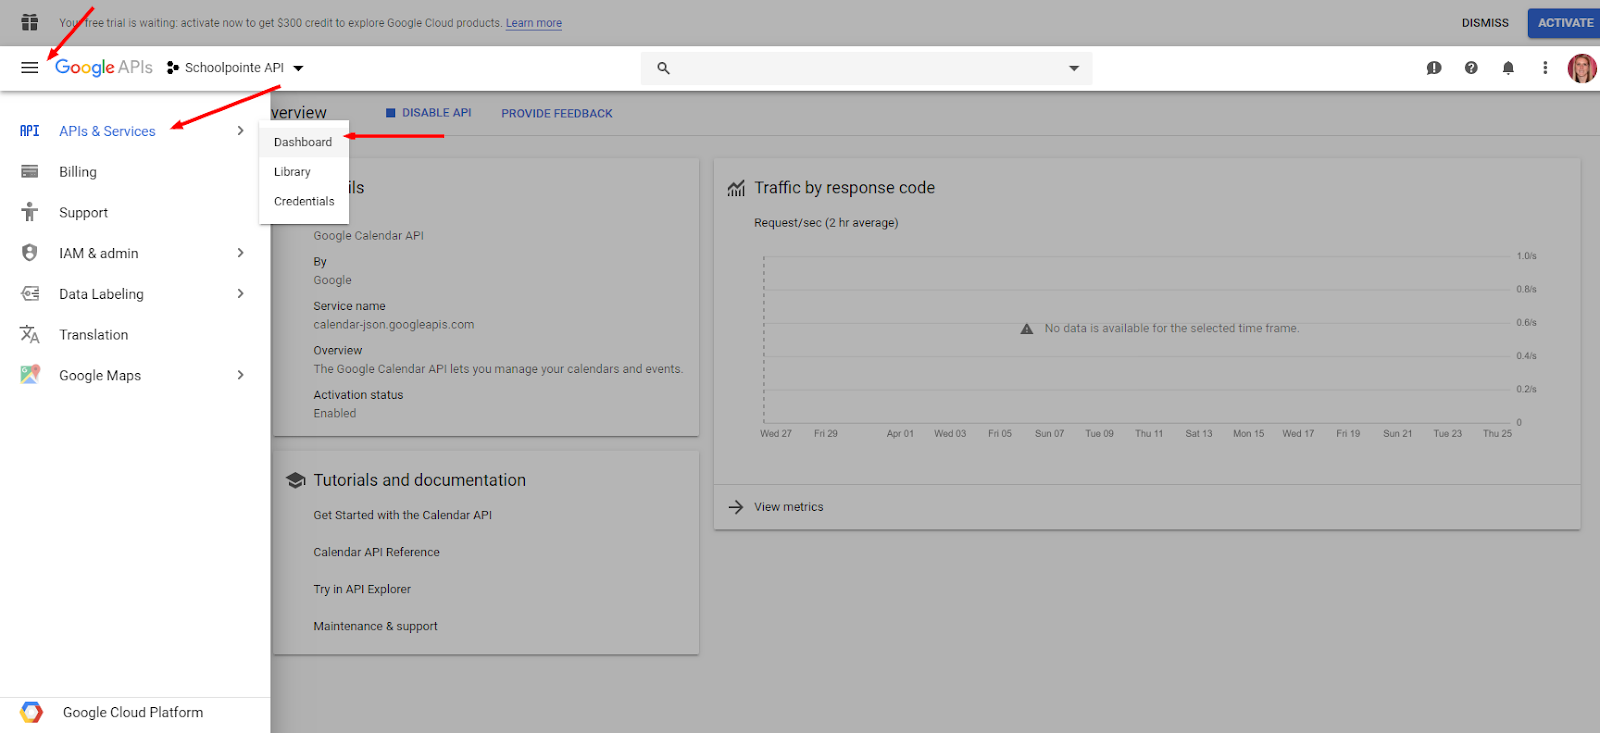
Click Dashboard and select + Enable APIS And Services or click on the following link (https://console.developers.google.com/apis/library )

Search for and Click on Google Drive API
Click Enable
(Click on the menu option from the left - API’s & Services - Dashboard to get you back to the Dashboard screen - see screenshot below)
Search for and Click on Google Picker API
Click Enable
(Click on the menu option from the left - API’s & Services - Dashboard to get you back to the Dashboard screen - see screenshot below)
Search for Google Calendar API
Click Enable
Click on the menu option from the left - API’s & Services to get you back to the homescreen or click on the following link https://console.developers.google.com/
Enable Google settings in the SchoolPointe CMS
Log into your Schoolpointe CMS websites and select Site Settings on the left
Paste your Google Client ID and Google API Key to Google Integration section
Enable Google Drive ( lets you import google drive files into the CMS website )
Enable Google Calendars ( if you no longer want to use schoolpointe events management- this will change your calendar if you an enable this)
Comments
Please Sign in to leave a comment if you don't see the comment box below.