If you are syncing with a Student Information System (SIS) your contacts will populate on this page automatically. If you have not yet set up your SIS with us, we partner with Global Grid for Learning. Please contact your sales representative or our support team. support@schoolpointe.com/866-545-2549.
If you are not utilizing SIS, there are two ways to add contacts. Add contacts individually by selecting the Add Contact Button, or upload a CSV file by selecting the Upload CSV file button.
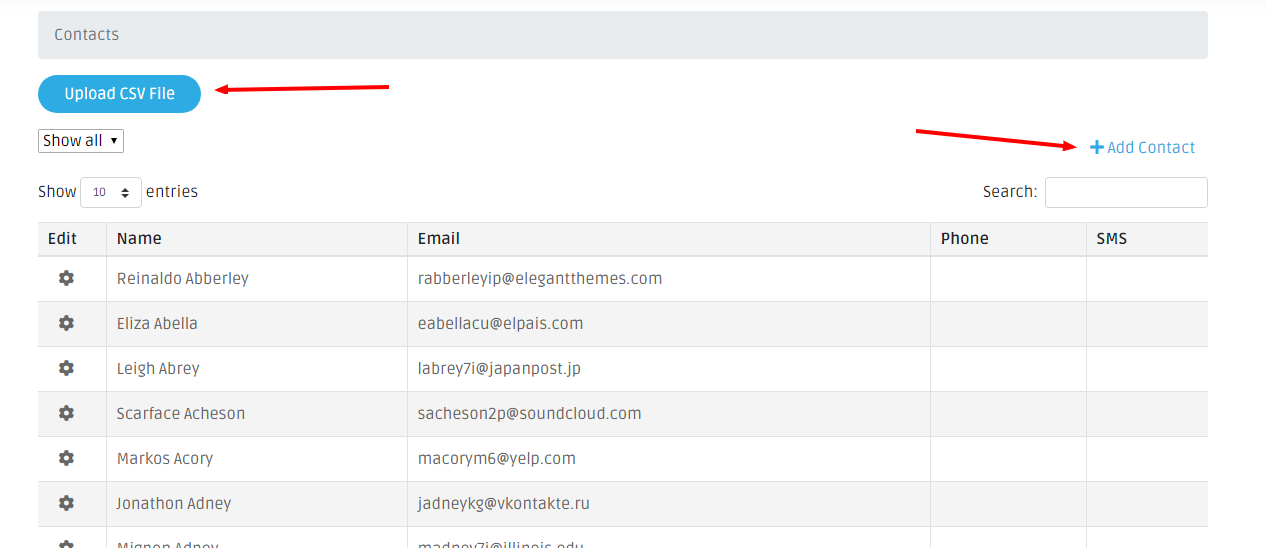
Adding Contacts: Individual
Select +Add Contact. Fill in the desired information. If you have created Contact Lists, you have the option to add this person to a Contact List (See Lists section in manual). Click Save.
Adding Contacts: CSV File
Select Upload CSV File. Click Choose File or Browse, navigate to your CSV and then click Open. Click Upload File. There is no specific format needed for the CSV, the option to map the fields will be given.

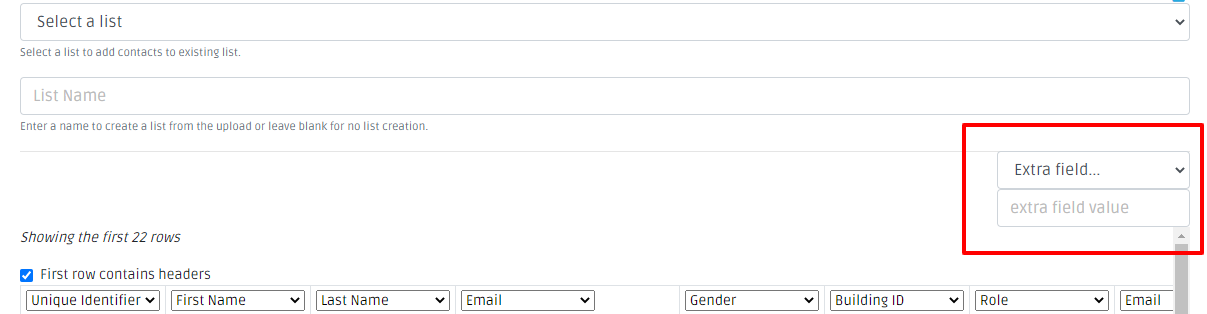
Once you have uploaded your CSV this takes you to the Import page. If you want to tie this contact import to an existing list, select the list here. Or, you can give this contact list a name.
**BEFORE CLICKING IMPORT DATA - Please read about the options***
You will see a glimpse of your CSV and all of the fields that were included on your CSV (not all of your contacts will show here).
If your CSV file has a header, click on the checkbox that asks if First Row Contains Headers. If your CSV file does not contain a header, keep this box unchecked and fill in the mapping titles.
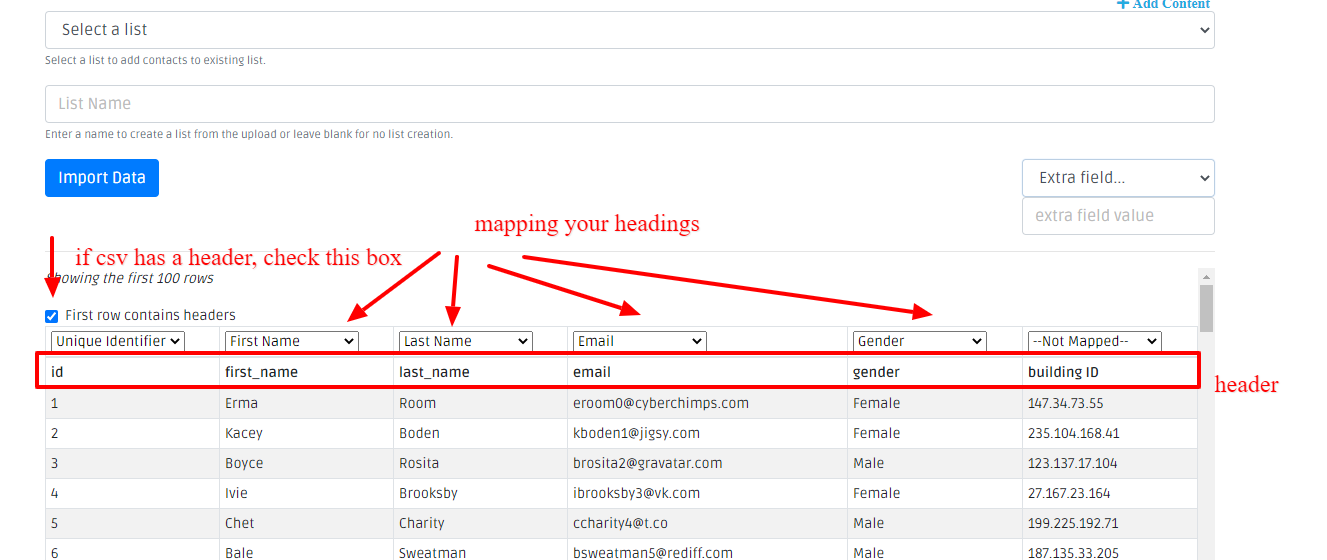
If the attributes of the headers are identified, the system will automatically assign them. If they are not identified, you have the option to manually do this. Click on --Not Mapped-- and choose the correct heading, or create a new heading by selecting --New Attribute--. These headings are important because this is how you filter your dynamic lists.
**Every person you import should have a Unique Identifier. This identifier should be unique to each person. Multiple people should never share the same identifier.** Most SIS provide this for you. If you are not importing your contacts through an SIS you can create this, just make sure each person has their own unique id.
Combining Same Contacts together
You can group your contacts based on their Unique ID. Example: You have a parent that has multiple emails & phone numbers. Instead of importing that user in multiple times, you can group them by their Unique ID.
Options
If you would like to group individuals, click Option and select the Transform Data button in the bottom left corner.
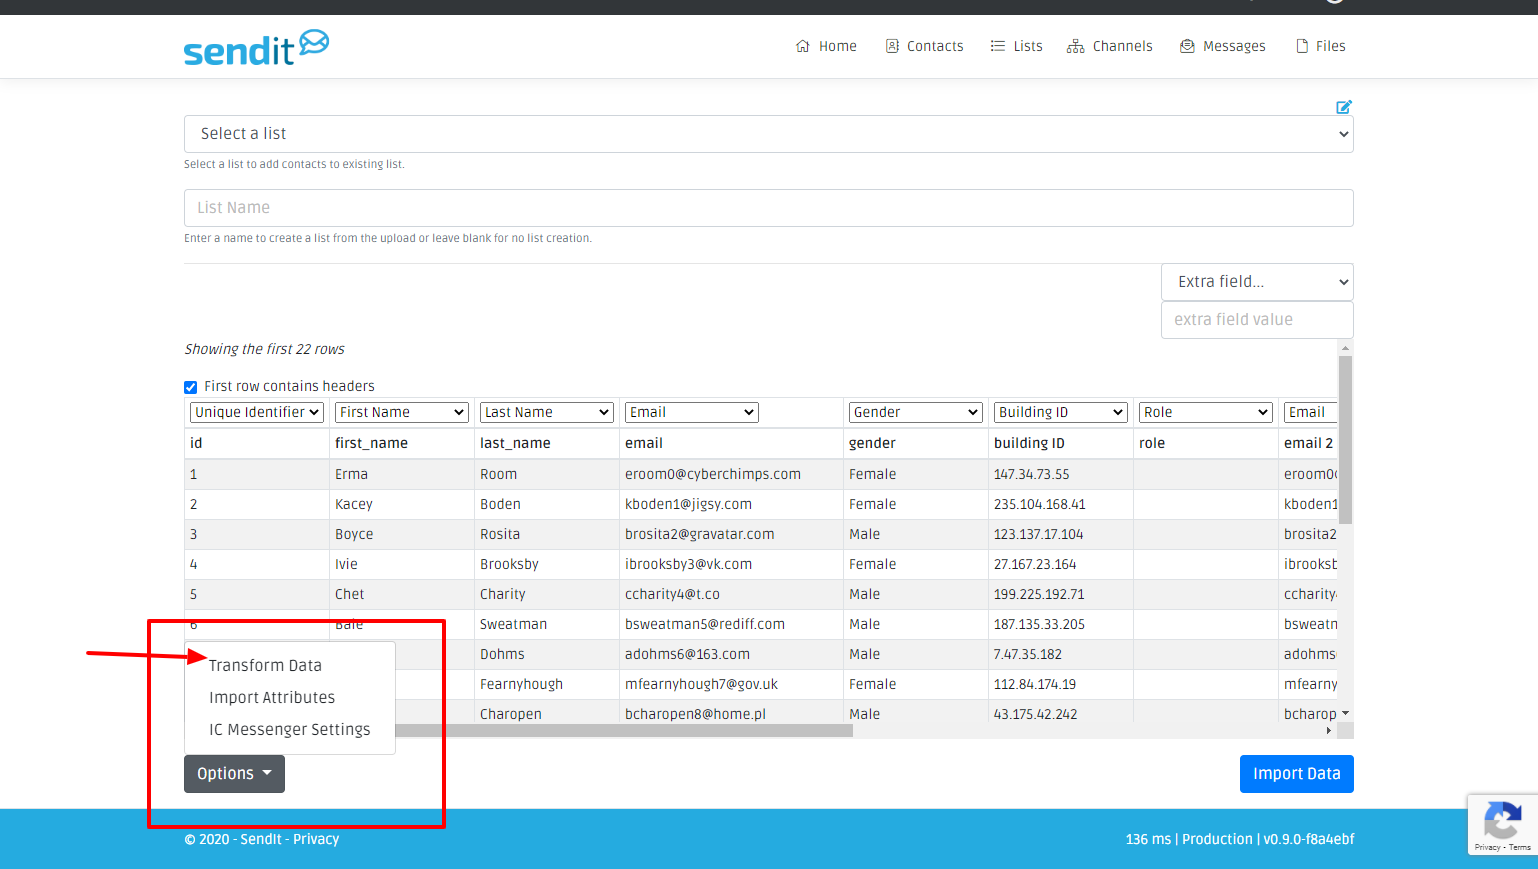
This will give you the option to choose your Unique Identifier, and select the fields that will have multiple entries.

Unique Identifier: choose the option that is your Unique ID.
Has Multiple: Choose the options of your list that contain multiple submissions. If you are not sure, select the Detect button. This will automatically go through your list and check the corresponding boxes/fields that contain multiple entries. Click Transform Data, check to make sure your data looks correct, and now Import your list.
Extra Field
If you would like this specific list of imports to all have a specific field allocated to them, you can either select from an already existing field by clicking on the Extra field drop down or you can type in a new field in the space below. Fields are important when creating and filtering dynamic lists.
Edit/Delete Existing Contacts
Click on the Setting icon next to the Name. Edit the information and save. If you are deleting this contact, click delete.

Now that your contacts have been added, when you click on the Edit contacts button you can view all of the information associated with that contact.
Contact Information Tab
Shows you the general information about this contact. Name/Unique Identifier/Email/Etc.
Additional Tab
This information either comes from the headers that were imported in with the csv import (see Adding Contacts:CSV FIle section of the manual) or if we are syncing with your Student Information System. This information is used to create dynamic lists.
Divisions/Buildings
If this contact belongs to any Divisions/Buildings that information will show here.
Lists
If this contact belongs to any Lists that information will show here.
Relations
If this contact is tied to any of the other contacts within SendIt, their names will show under the Relations tab and you can view their contact information directly from here.
Searching/Filtering Contacts
To search for a specific contact you can utilize the Search field that is placed in the top right area of the contacts page. As you type, the system will start generating results.
There is also an Advanced Search option located under the contact listing. Clicking the Advanced Search button allows you to search for any additional attribute assigned to a specific contact.
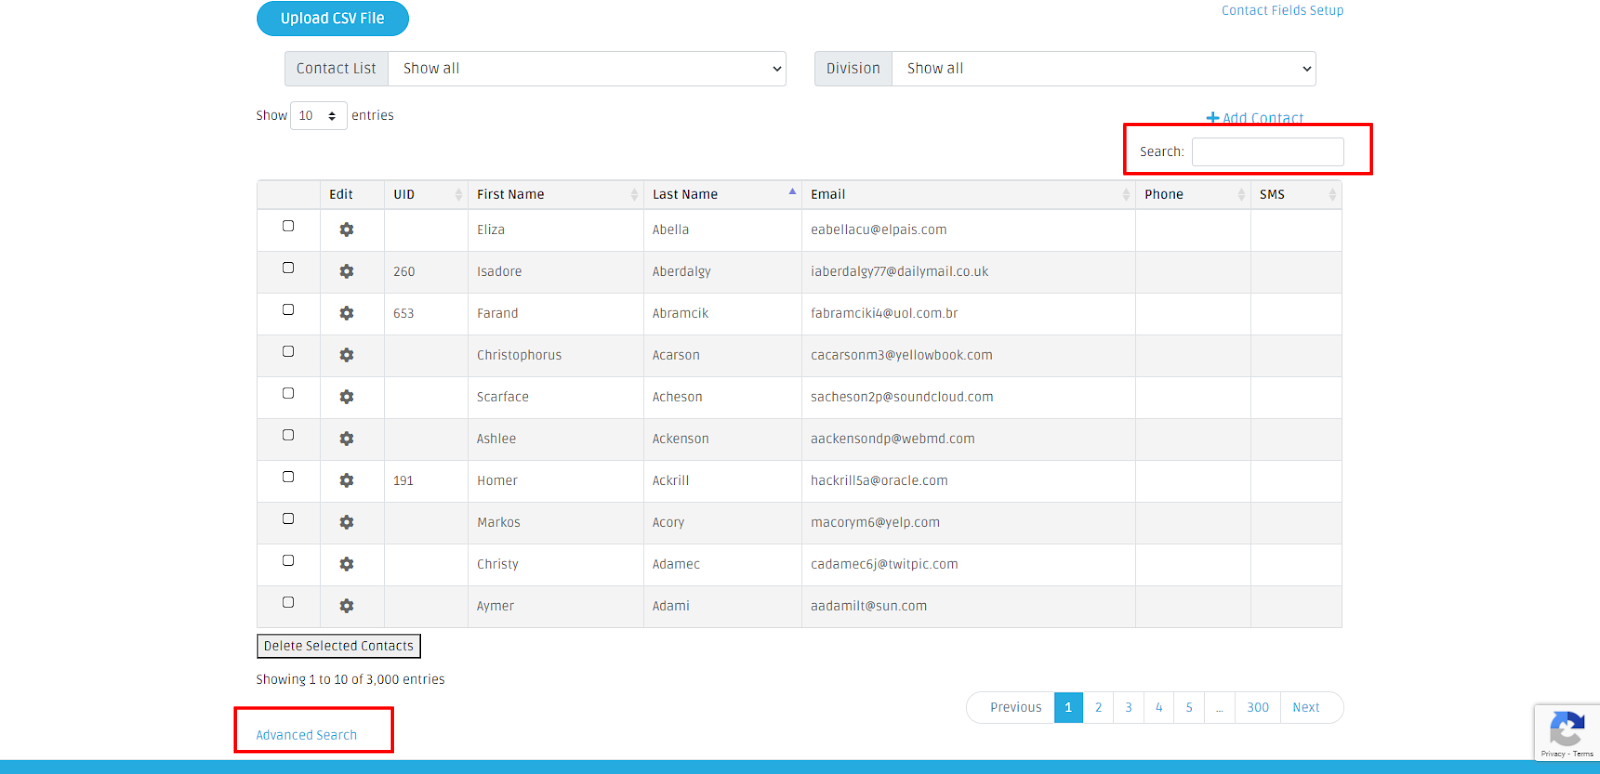
You are able to adjust the number of entries that you see at a time by adjusting the Show Entries option. You can also sort the contacts by specific list or by specific division by clicking the Show All dropdown boxes.

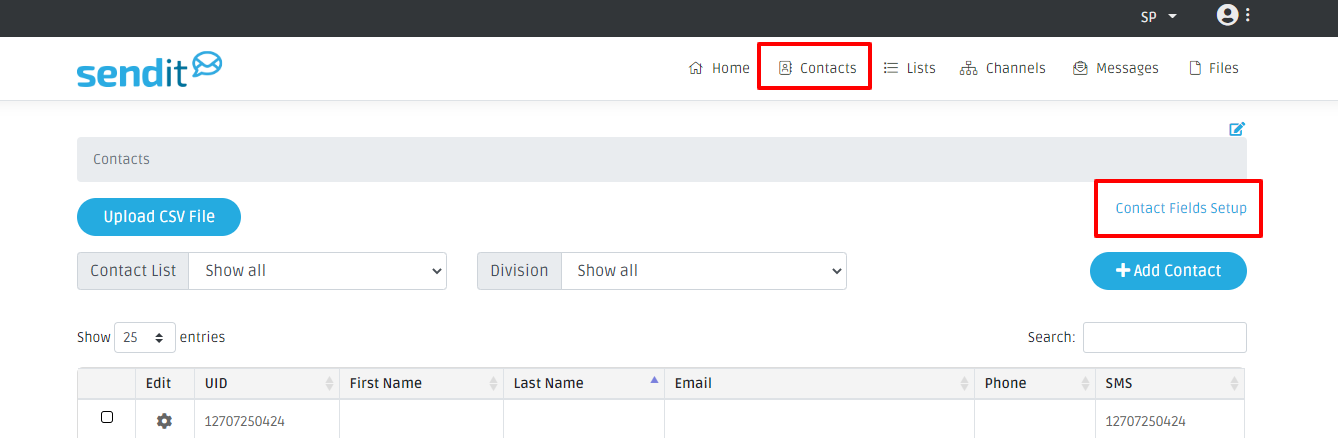
Contact Field Setup
Contact fields allow you to group your contacts into specific fields. To set up the Contact Fields, click Contacts and then select the Contact Fields Setup link.
There are two places within SendIt that contact fields affect, the Individual Contacts and the default fields that are automatically selected with sending a message (see the Creating A Message section of this manual).
Name
This information either comes from the headers that were imported in with the csv import (see Adding Contacts:CSV FIle section of the manual) or if we are syncing with your Student Information System, those fields are also named here.
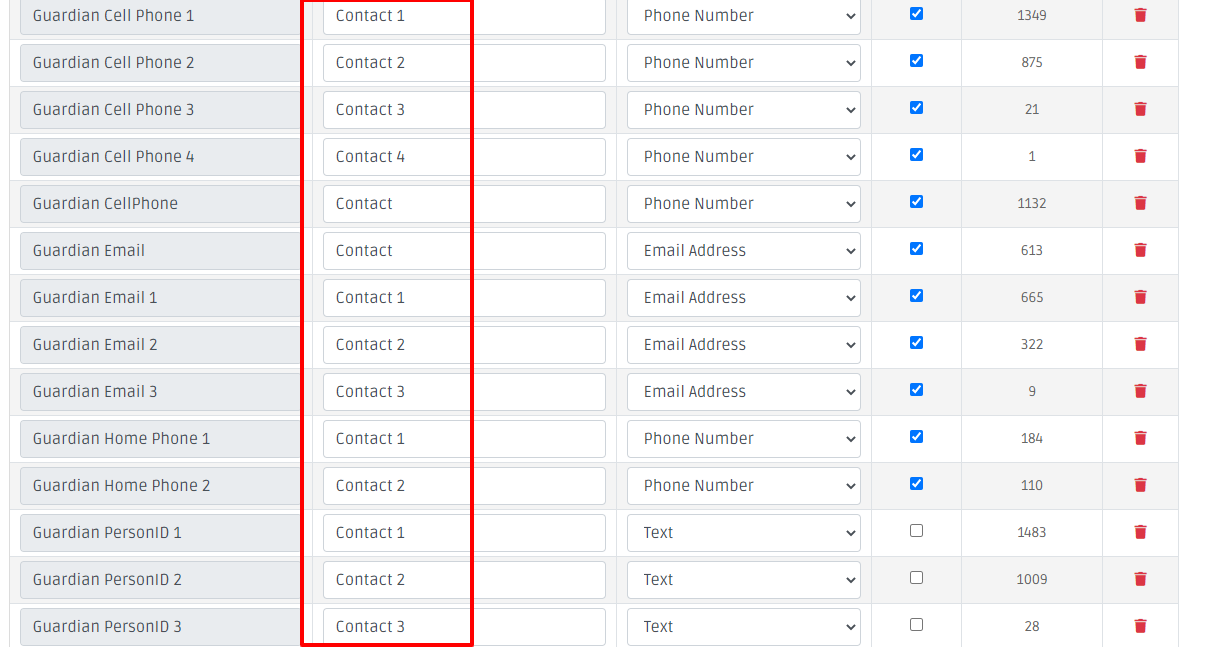
Group
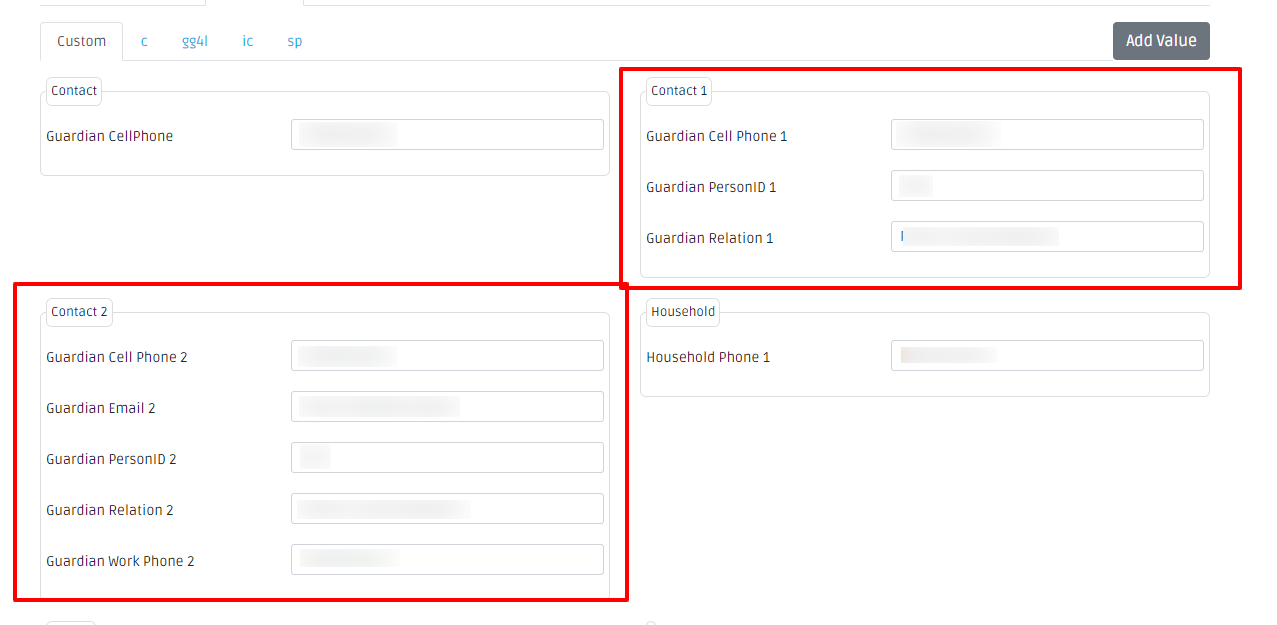
When you click on the settings button on an individual contact (see the Edit/Deleting Existing Contact section of the manual) and then click on the Additional tab, you will see all of the fields that are associated with that specific contact. The Group portion of the contact field set up will organize all of these fields into groups.
For example, if you have three different contacts for one student, guardian 1, guardian 2, and guardian 3. You can group them together so that all of guardian 1’s information is together, all of guardian 2’s information is together and all of guardian 3’s information is together. You would put Contact 1 (or whatever title you wanted to name that group) next to all of the guardian 1 contact fields. Contact 2 next to all of the guardian 2 contacts, and Contact 3 next to all of the guardian 3 fields.
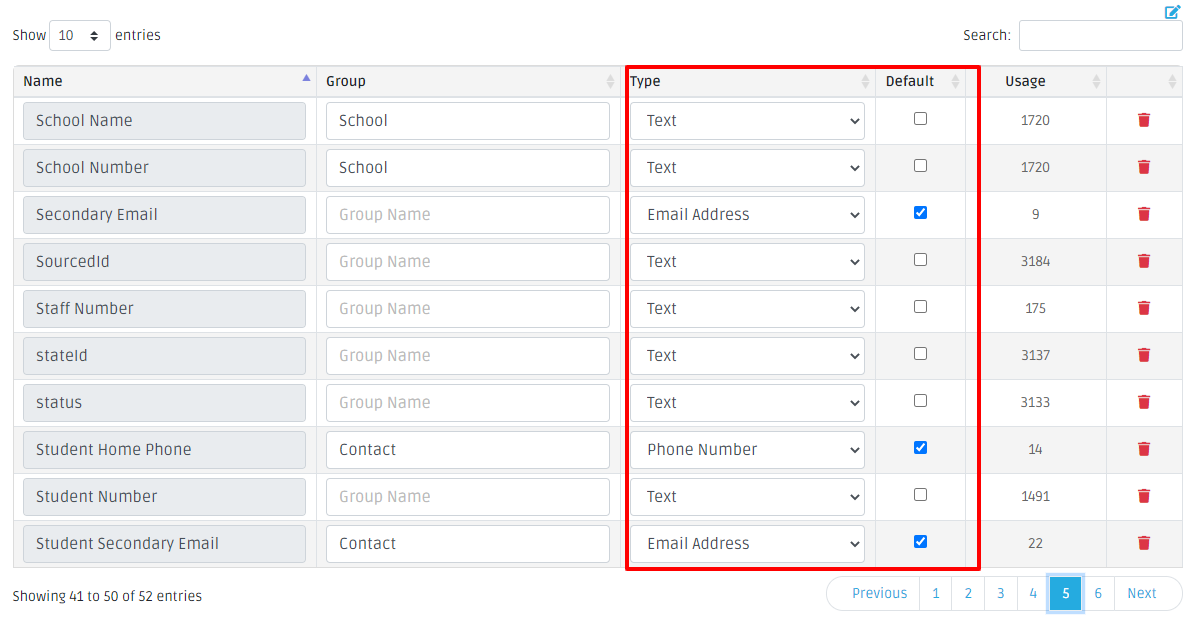
Type/Default
This is where you choose which fields are automatically selected when setting up your message to send. When you are setting up a channel within a draft message (see the Creating A Message section of this manual) there is an option to select which contact fields you would like this message to go to. When you click that dropdown, there are already contact fields selected for you. Setting up the Types/Defaults tell which contact field is automatically selected. To set this up, click on the Type dropdown next to the contact field and choose which channel you want this added to. To make this a default, click the Default checkbox that is the right. If you do not want to allocate a field, leave the Type set to text and leave the default box unchecked.
Comments
Please Sign in to leave a comment if you don't see the comment box below.