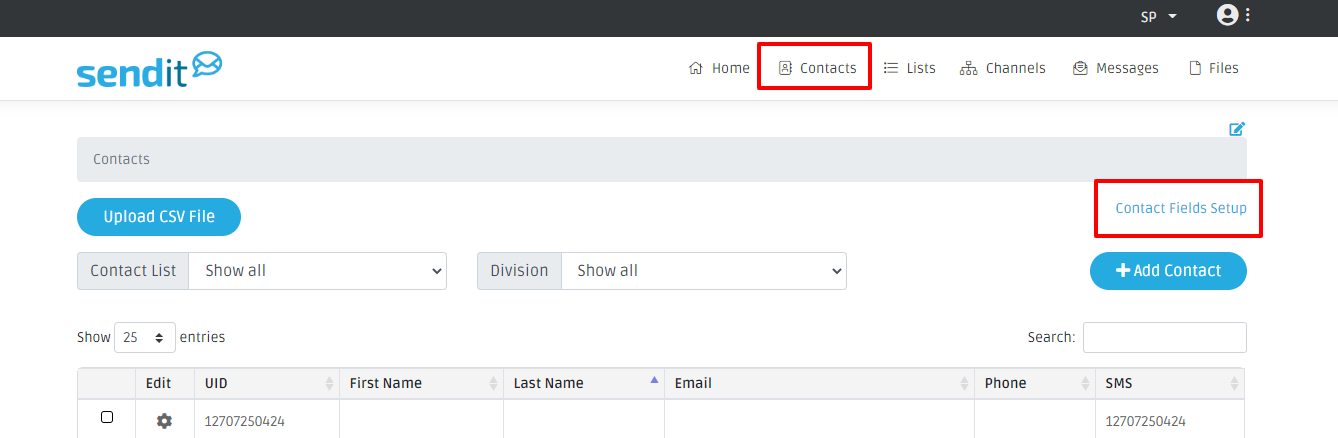
Click the Contacts tab and click the Contact Fields Setup link. Contact fields allow you to group your contacts into specific fields. To set up the Contact Fields, click Contacts and then select the Contact Fields Setup link.
There are two places within SendIt that contact fields affect, the Individual Contacts and the default fields that are automatically selected with sending a message (see the Creating A Message section).
Name
This information either comes from the headers that were imported in with the csv import (see Adding Contacts:CSV FIle section) or if we are syncing with your Student Information System, those fields are also named here.
Group
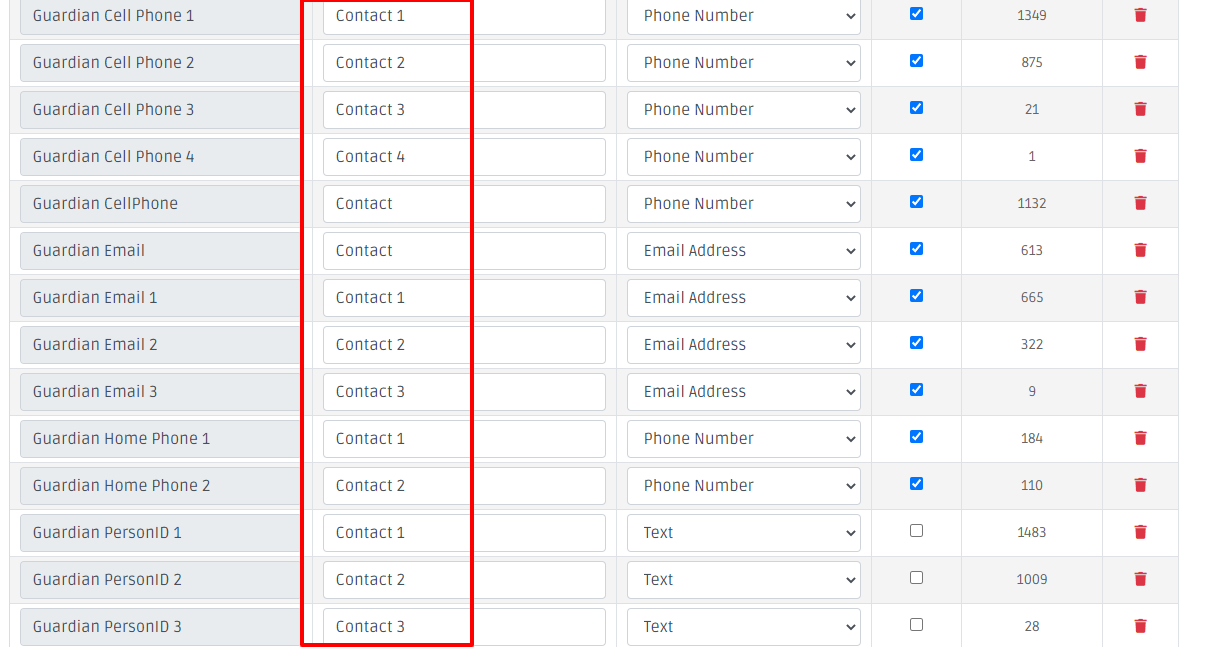
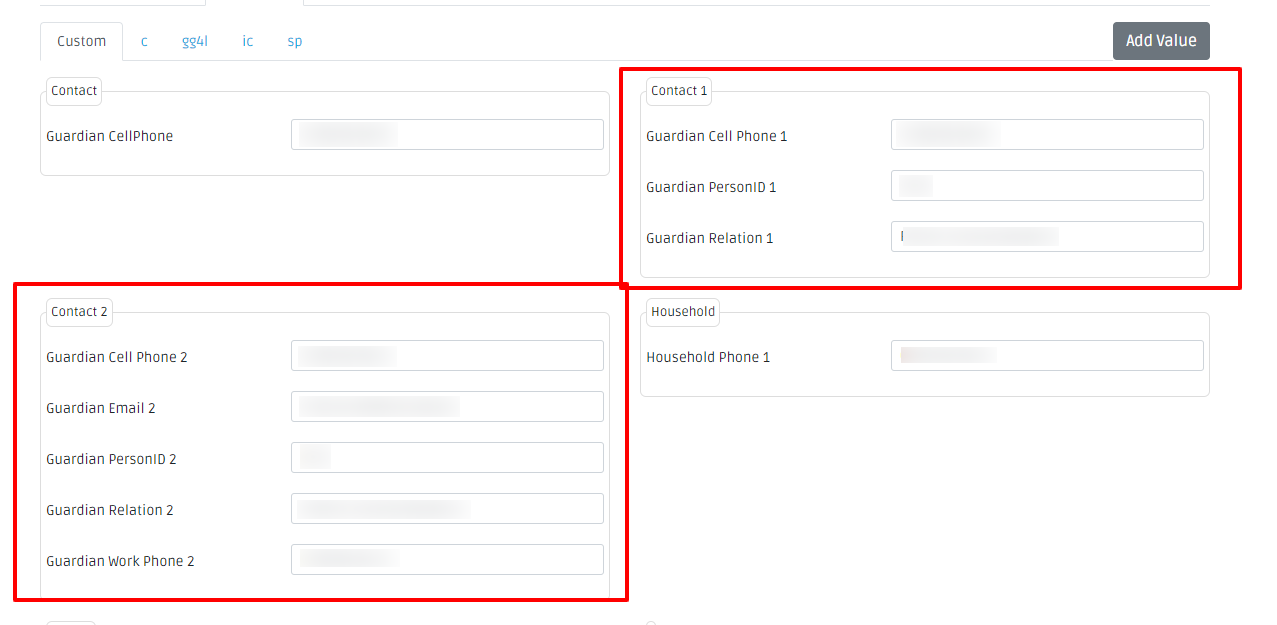
When you click on the settings button on an individual contact (see the Edit/Deleting Existing Contact section) and then click on the Additional tab, you will see all of the fields that are associated with that specific contact. The Group portion of the contact field set up will organize all of these fields into groups.
For example, if you have three different contacts for one student, guardian 1, guardian 2, and guardian 3. You can group them together so that all of guardian 1’s information is together, all of guardian 2’s information is together and all of guardian 3’s information is together. You would put Contact 1 (or whatever title you wanted to name that group) next to all of the guardian 1 contact fields. Contact 2 next to all of the guardian 2 contacts, and Contact 3 next to all of the guardian 3 fields.
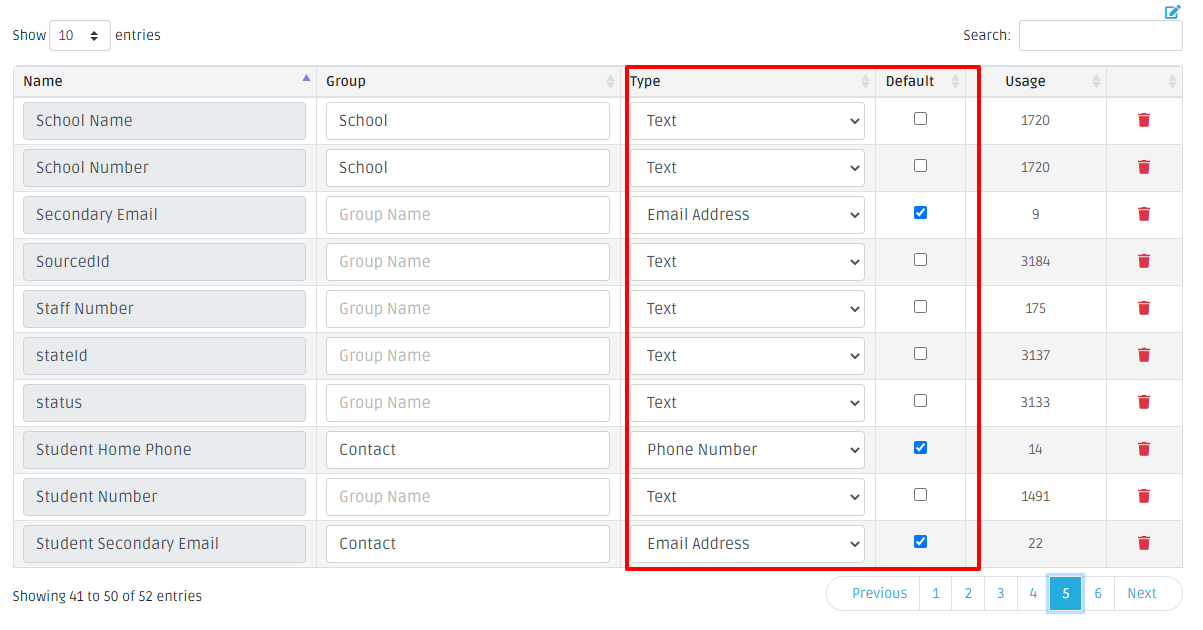
Type/Default
This is where you choose which fields are automatically selected when setting up your message to send. When you are setting up a channel within a draft message (see the Creating A Message section) there is an option to select which contact fields you would like this message to go to. When you click that dropdown, there are already contact fields selected for you. Setting up the Types/Defaults tell which contact field is automatically selected. To set this up, click on the Type dropdown next to the contact field and choose which channel you want this added to. To make this a default, click the Default checkbox that is the right. If you do not want to allocate a field, leave the Type set to text and leave the default box unchecked.
Comments
Please Sign in to leave a comment if you don't see the comment box below.