
Click on the Profile Icon, this will give you the option between My Profile, Organization, or you can log out here.

Organization Home
Here you can add/update the name of your organization
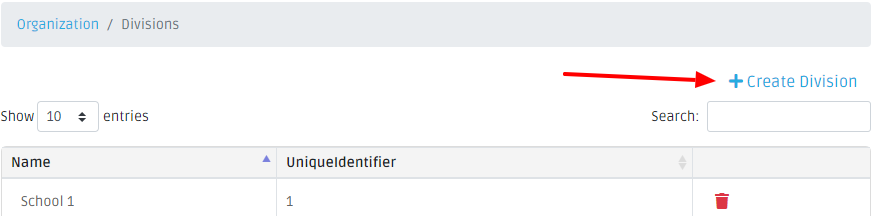
Divisions
This is where you will add your schools or other buildings/divisions. This will be useful for creating dynamic lists or for filtering your contacts. Each division needs a uniqueidentifier. You can either obtain this from your SIS or create these yourself. If you are syncing SendIt with your SIS, this information will be brought over for you.
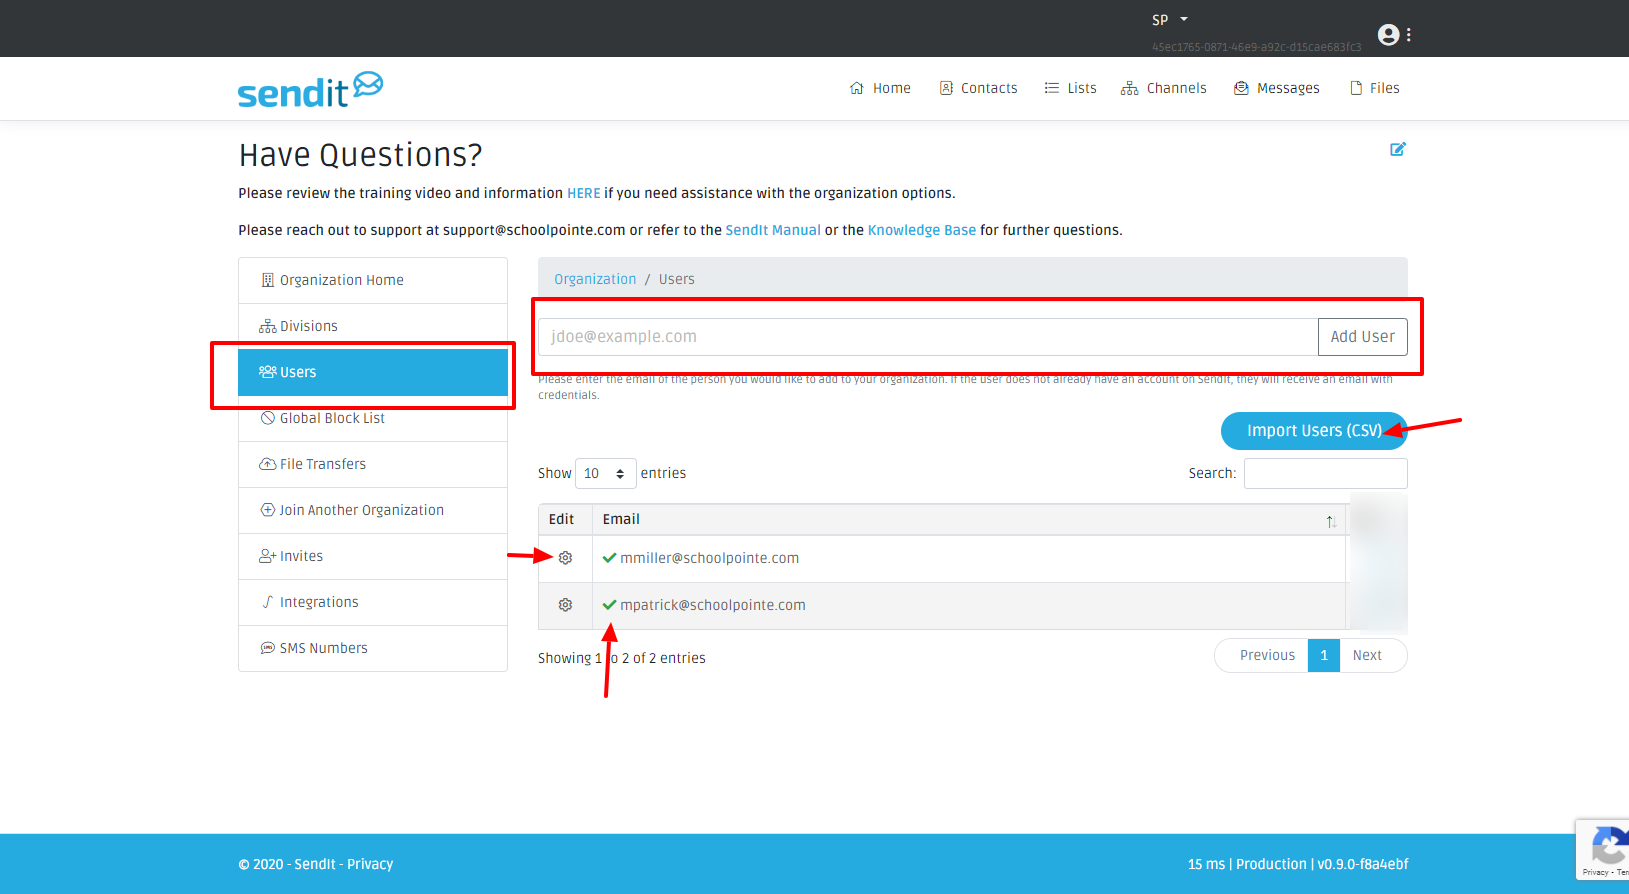
Users
This is where you add users and control users permissions. The users that are added here will be logging into SendIt to send messages, this is different from the general contact list (people receiving messages). To add a user, put that person’s email address in the space provided and click Add User. This will send that user an email with a link to SendIt and a temporary password.
You can also do a bulk import (csv) by clicking on the Import Users button. There is a specific format for this, Please upload a file with two columns and a header, the first column is the email address of the new user, and the second column is the division unique identifier. If not assigning a user to a division you can leave that field blank.
Email,DivisionId
user@example.org,0001
user1@example.org,0002
Once you have invited a user into your organization, you will see a green checkmark next to the users that have received the link and have logged in.
You can manage any users permissions, reset their password, or remove that person as a user by clicking on the Edit button next to their email. Select which divisions/lists you would like this person to have access to by checking the appropriate boxes and clicking save. To reset their password or remove them as a user, click on the grey options button in the top right section of the screen.
See the Permissions section to learn how to set permissions
Global Block List
If an individual says they no longer would like to receive information you can add their information to the block list. Add the phone number and/or email address and check the appropriate boxes. You can only add one email or one phone number at a time, then click Add Block. All blocked information is listed below.
File Transfer
SendIt provides the ability to set up automated messages (Example: Attendance calls or lunch menu balances). The file transfer section gives you the ability to upload the csv file of contacts that need to receive that specific message. See the Setting up Automated Messages section of this manual.
Join Another Organization
If there is another organization you help manage, you can join that organization here. Once you have been invited to join (see Invites below), you will be provided with an invite code which you enter here.
Invites
This is where you send out invitations to other SendIt users and have them join your organization. Add the email into the space provided and click Invite. This will send an invite code. That person can now add that code into the Join another Organization section of their SendIt account.
Integrations
We integrate with many Student Information Systems. If you have One Roster and SwiftReach, here you can add the information they provide you and can set up that integration yourself. We also provide SchoolPointe’s API key here as well. **If you plan to integrate with a SIS please contact your support representative and let them know**
Permissions
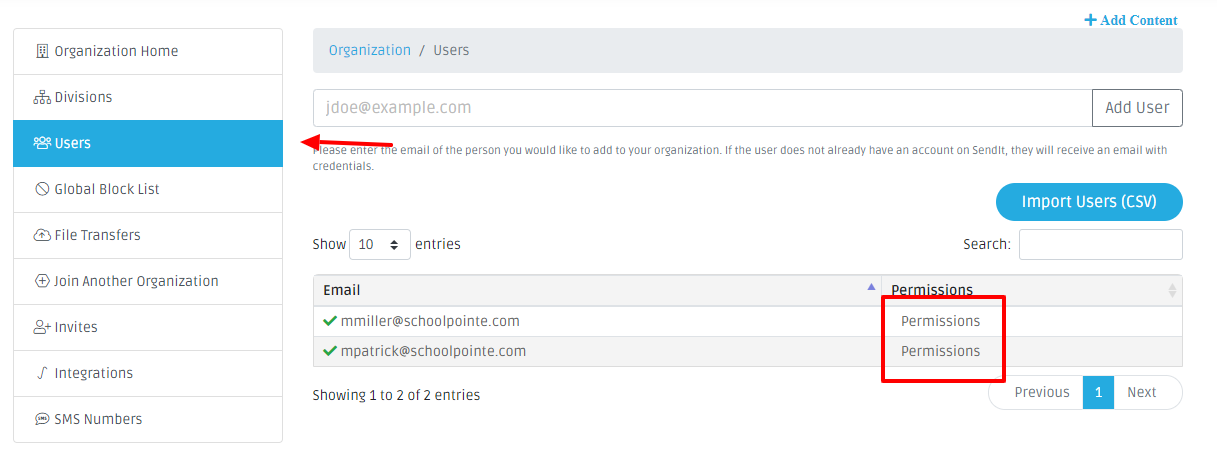
Click on the Profile Icon, select Organization and then select Users.
This is where you will see your list of individuals that have the ability to log into SendIt and use this product to send messages. With the permissions, you can limit what lists/contacts they have the ability to send messages to.
Click on permissions next to the person you want to edit permissions too.
Organization Admin
Gives you access to everything under your account
Division Permissions
By checking one or more of these boxes, this will provide the ability to send messages to the people assigned to those specific divisions
Contact List Permissions
As you set up your lists, by checking one or more of these boxes, this will provide the ability to send messages to the people assigned to those specific lists.
Comments
0 comments
Please sign in to leave a comment.