
File Transfer
**Contact support first prior to set up**
SendIt provides the ability to set up automated messages (Example: Attendance calls or lunch menu balances). The file transfer section gives you the ability to upload the csv file of contacts that need to receive that specific message.
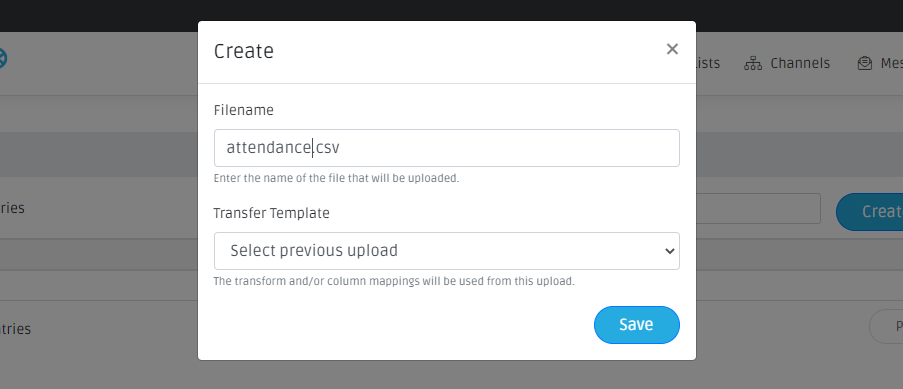
To upload a file, click Create File Transfer and provide the Filename (Example: attendance.csv). Do not choose a Transfer Template unless given instruction to do so. Click Save.
**Remember, you will need to reuse the Filename provided for this initial file transfer - this will be important when setting up the automated message**
Setting Up a File Transfer Template
To set up a template for the automated file transfers, select Messages and create a new message. Give it a title (Example: Attendance Template). Change the Message Type to TEMPLATE. Do not select any contacts. The contacts are generated from the file that is uploaded into the File Transfer area. Set up the channels and save the template.

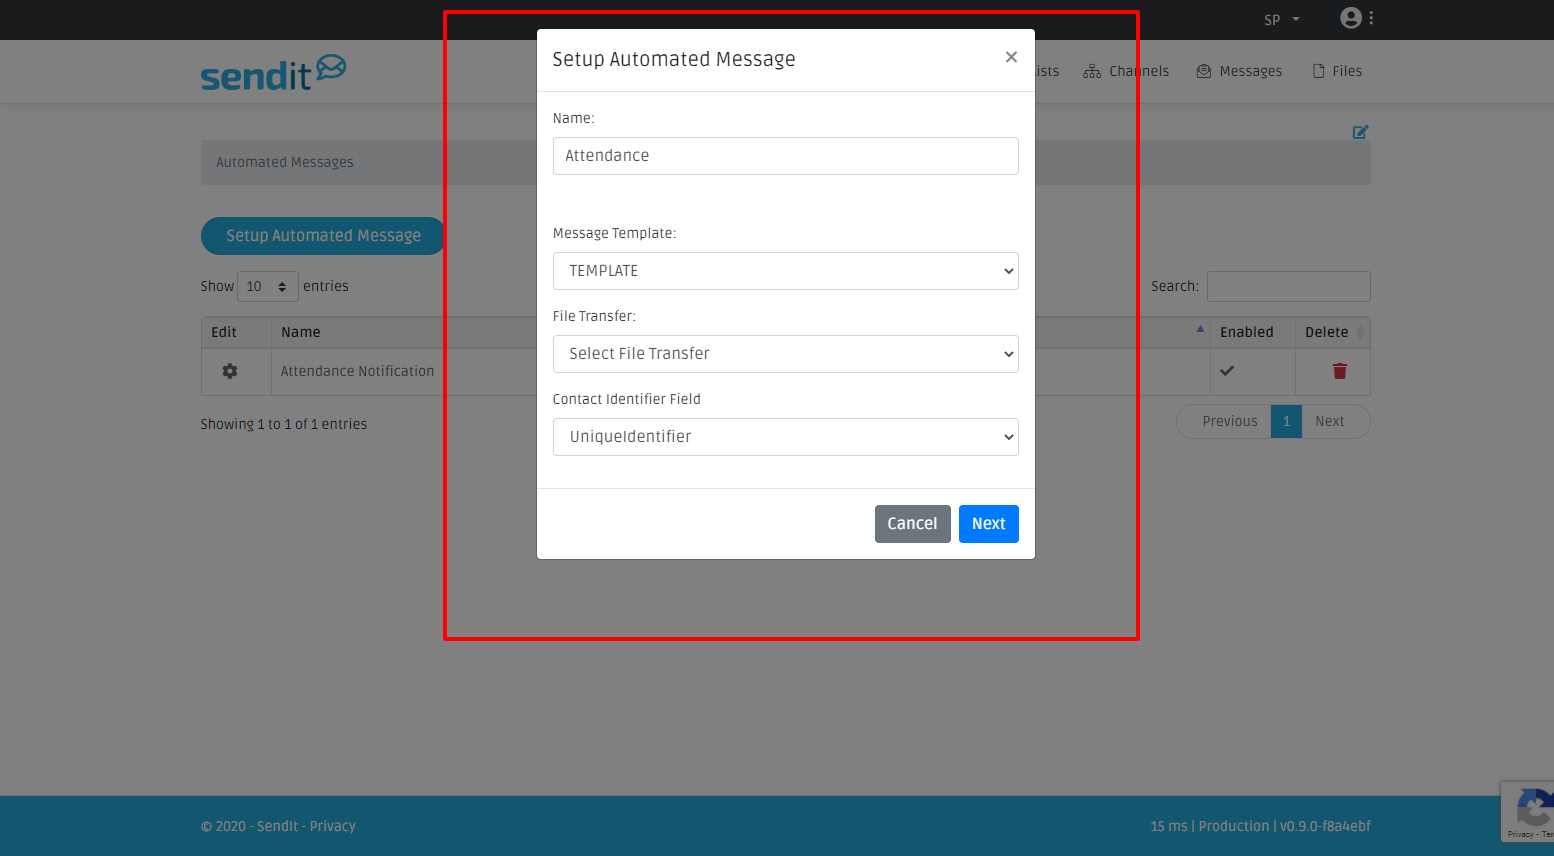
Setup Automated Message
https://sendit.schoolpointe.com/automatedmessages: This is where you set up the automated message. Click Setup Automated Message and provide this message a Name (Example: Attendance Report). Select which template you would like to use (you can set up multiple templates for various things). Select the File Transfer (this is why the filename is important for the File Transfer. This automated message is looking for this exact file name).Select the Contact Identifier Field. This will typically be the Uniqueidentifer. Click Next. Click the enable box and then click save. If at any point, you can enable an automated message.
Initiating an Automated Message
Once you set up the initial File Transfer, you have your template and automated message set up, you can send your automated message. To send an automated message, click on the silhouette in the top right corner and select organization. Click on File Transfer. Upload the csv file here. Remember, the system is looking for the original name used when setting this up.
Example: If you set up an attendance message(using the example above), when setting up the automated message, the file name used to set up the file transfer is what you want to use here. The example used above was attendance.csv.
Once the file is uploaded, the automated message takes over, the message will automatically get sent out, and the file will clear out and you can upload the same file name tomorrow.
Comments
0 comments
Please sign in to leave a comment.