Now it is time to send your messages! Select Messages from the main menu, or you can also click on the Home option. On this landing page, you can create new messages, Quick Create a message, see the status of any message, and there are additional options for each message.
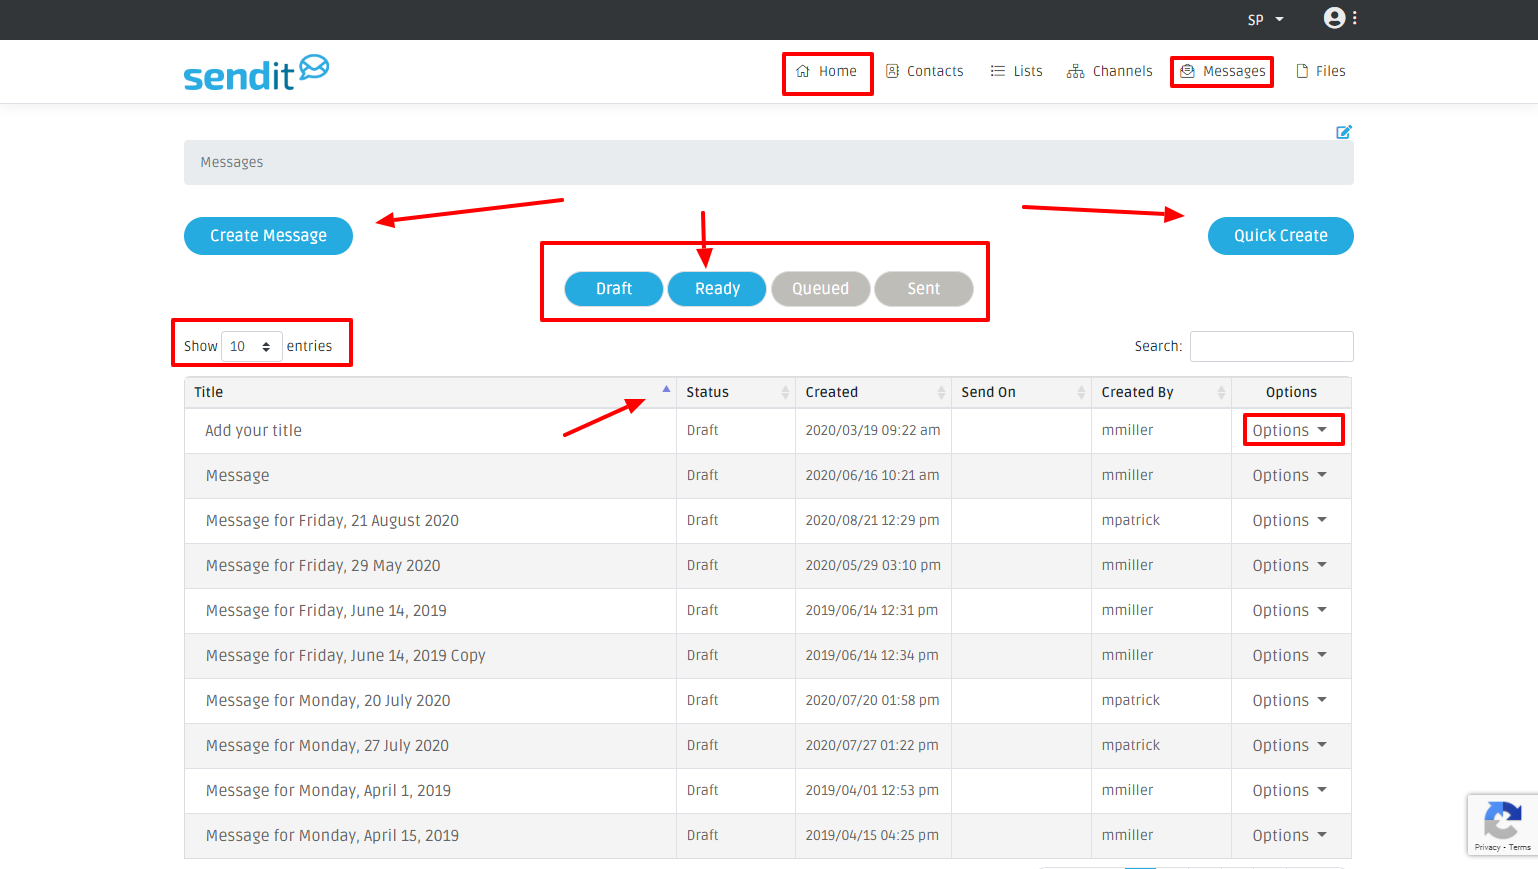
The Draft/Ready/Queued/Sent buttons in the middle of the page allow you to show/hide specific message groups. You can show more than one message group at a time. Message groups you are currently viewing are blue. Hidden groups are grey.
You can arrange the message listing by clicking on the arrows next to the title and show up to 100 entries at a time.
To view the message information, click on Options. You can edit and draft messages from here, send a message, duplicate any message or view the History/Status of a message. See the Message Options section of this manual for more information. You can also delete a message from here.
To send a new message
You have multiple ways to send a message. You can Create a new message, send a Quick Create message, edit a current Not Scheduled message, or duplicate an already created message.
Create Message:
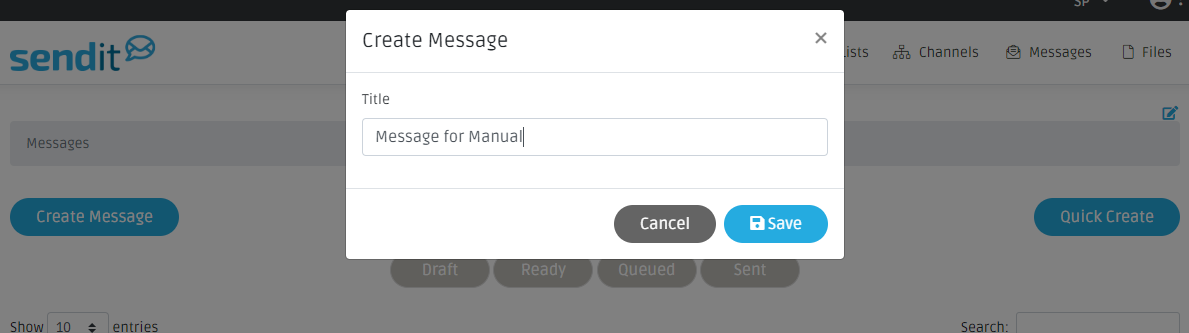
Click Create Message, provide the message a Title. The date will automatically fill in as the title if you decide not to create one.
Click Save, and this will take you to the Message Settings Page. Here you can edit your title if needed and you can choose the message type (Template is only used for the automated message setup. Do not choose Template unless you are setting up an automated message). Then you need to decide which contact list(s) you would like to send this message to. All of the contact lists that have been set up and that you have permissions to will show as an option. You also can send a message to a specific division (see the Organization Options section of the manual on how to set up Divisions).
Select which list(s)/division(s) you would like to send this message to, you can also click the All Contacts to send this to the entire contact list. Then click Save.
Click the blue + icon to set up the channels (email/text/phone call/etc). You can set up one or multiple channels here.

Email:
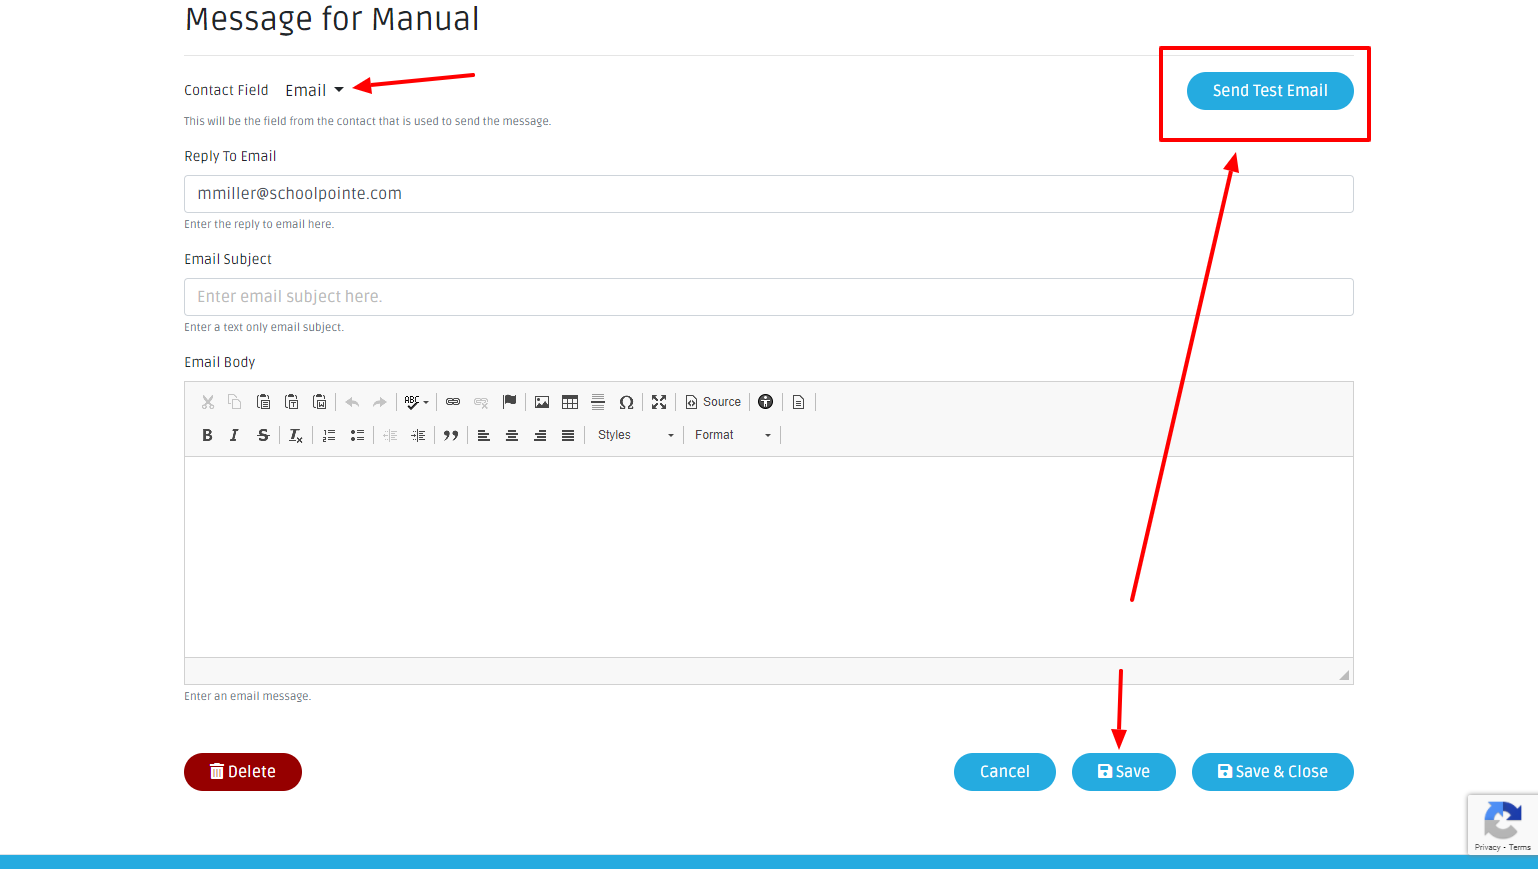
Click on the add channels + button and select email, a new page will open asking for message details.
The Contact Field is showing you which fields this message will go to. Click the drop down arrow and you can check/uncheck any field. You can set up default options here. See the Contact Fields Setup section of this manual.
Reply to Email is the email that will show as the reply to email **When setting up your channels if you filled in the Default Reply To Email Address box, that email will automatically populate here. You can edit this email if desired OR you can set this up through the SendIt Settings. See the My Profile Options section of the manual**
Email Body is where you put your message
At any time you can send a test email. You must click save first and then click the Send Test Email button.
Click save and close
Voice (Phone Call):
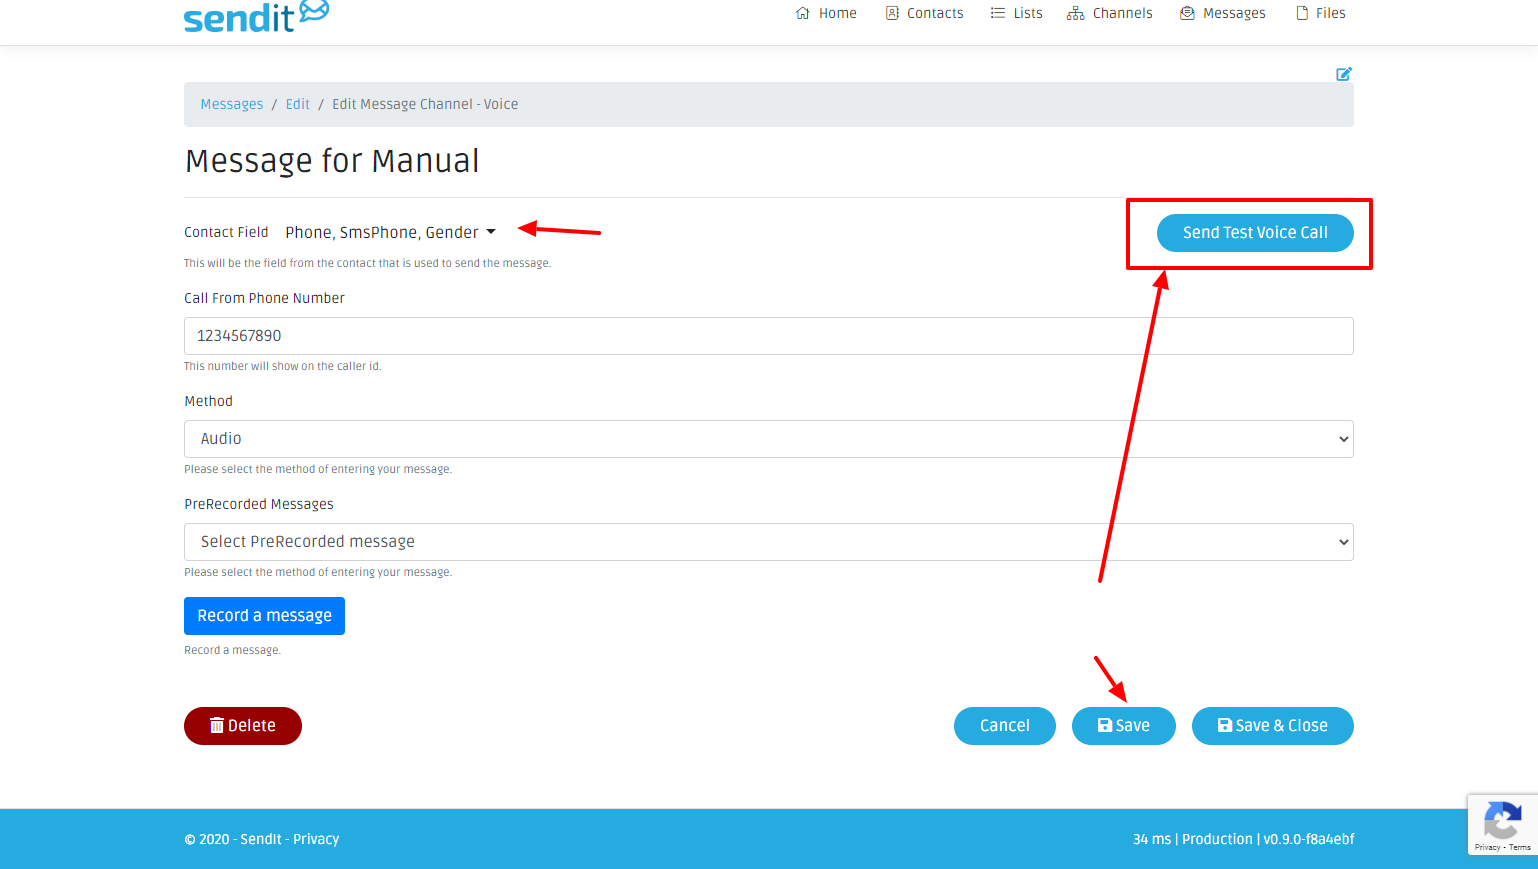
Click on the add channels + button and select Voice, a new page will open asking for message details..
The Contact Field is showing you which fields this message will go to. Click the drop down arrow and you can check/uncheck any field. You can set up default options here. See the Contact Fields Setup section of this manual.
The Call From number is the number that will show on the caller ID **When setting up your channels if you filled in the Default Reply To Email Address box, that email will automatically populate here. You can edit this email if desired OR you can set this up through the SendIt Settings. See the My Profile Options section of the manual**
The Method of how to send your message (audio or text). Select Text here and a message box will appear for your message. Select Audio and it will give you the option to select from a PreRecorded message (what you either uploaded or created in the Files section will show here) or you have the option to record a new message. **To record a message here, you must have a computer microphone. If no microphone is available, record your message through the Files section and then select it from the PreRecorded messages**
At any time you can send a test call. You must click save first and then click the Send Test Call button.
Click save and close
Text (SMS):
Click on the add channels + button and select text, a new page will open asking for message details.
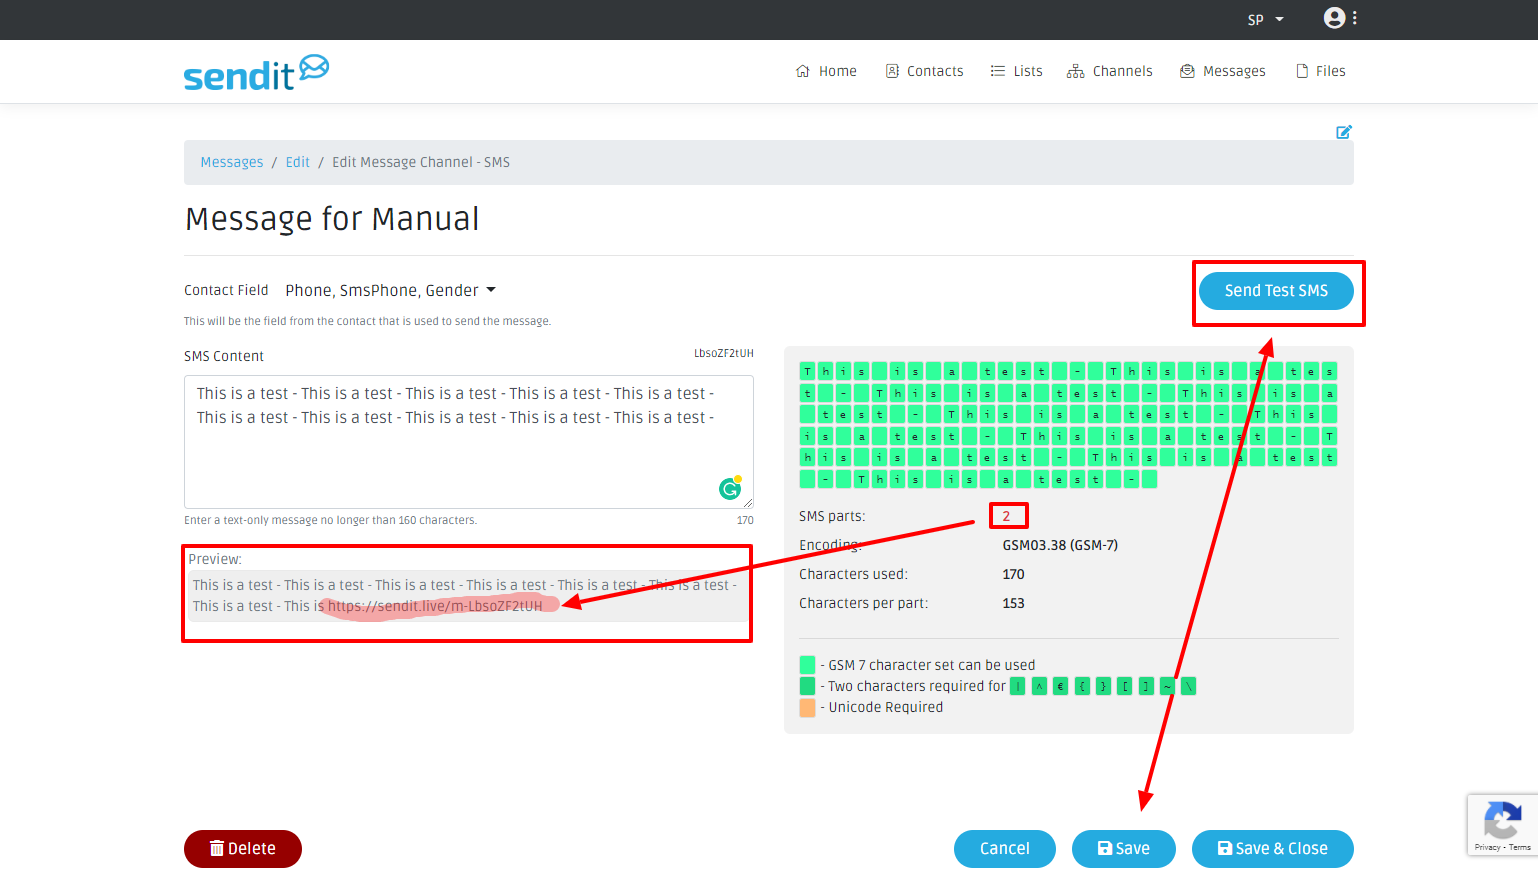
The Contact Field is showing you which fields this message will go to. Click the drop down arrow and you can check/uncheck any field. You can set up default options here. See the Contact Fields Setup section of this manual.
Type your message into the Content area. You can see additional information populate to the right of the content area as you type your message. This keeps track of how long your message is. Once your message hits a certain character limit, a link is automatically created so that your message is sent in one text versus multiple texts. The preview panel will show you how the text message will look once you send it. You can preview the link, click save and then copy and paste the link URL in a new window.
At any time you can send a test text message. You must click save first and then click the Send Test SMS button.
Facebook:
Click on the add channels + button and select Facebook, a new page will open asking for message details. Type the message you would like to post to the Facebook page. Then click save and close.
Twitter:
Click on the add channels + button and select Twitter, a new page will open asking for message details. Type the message you would like to post to the Twitter page. Then click save and close.
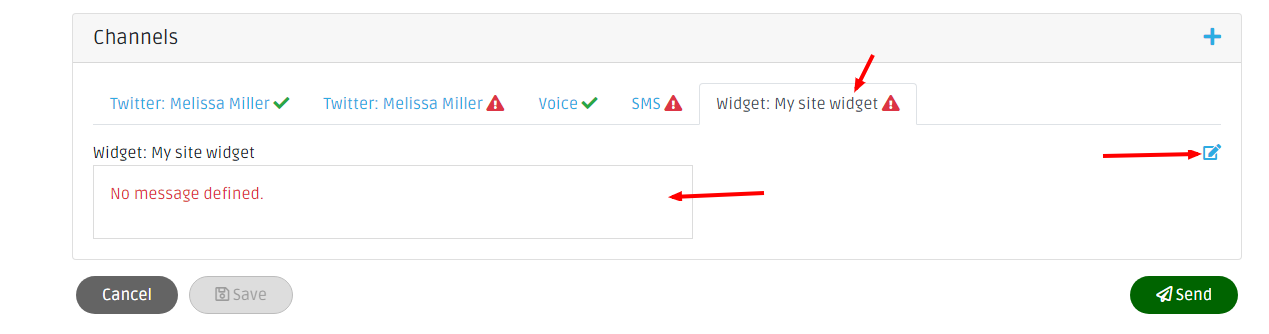
Site Widget:
Click on the add channels + button and select Site Widget, a new page will open asking for message details. Provide a title and then type the message you would like to show. Then click save and close.
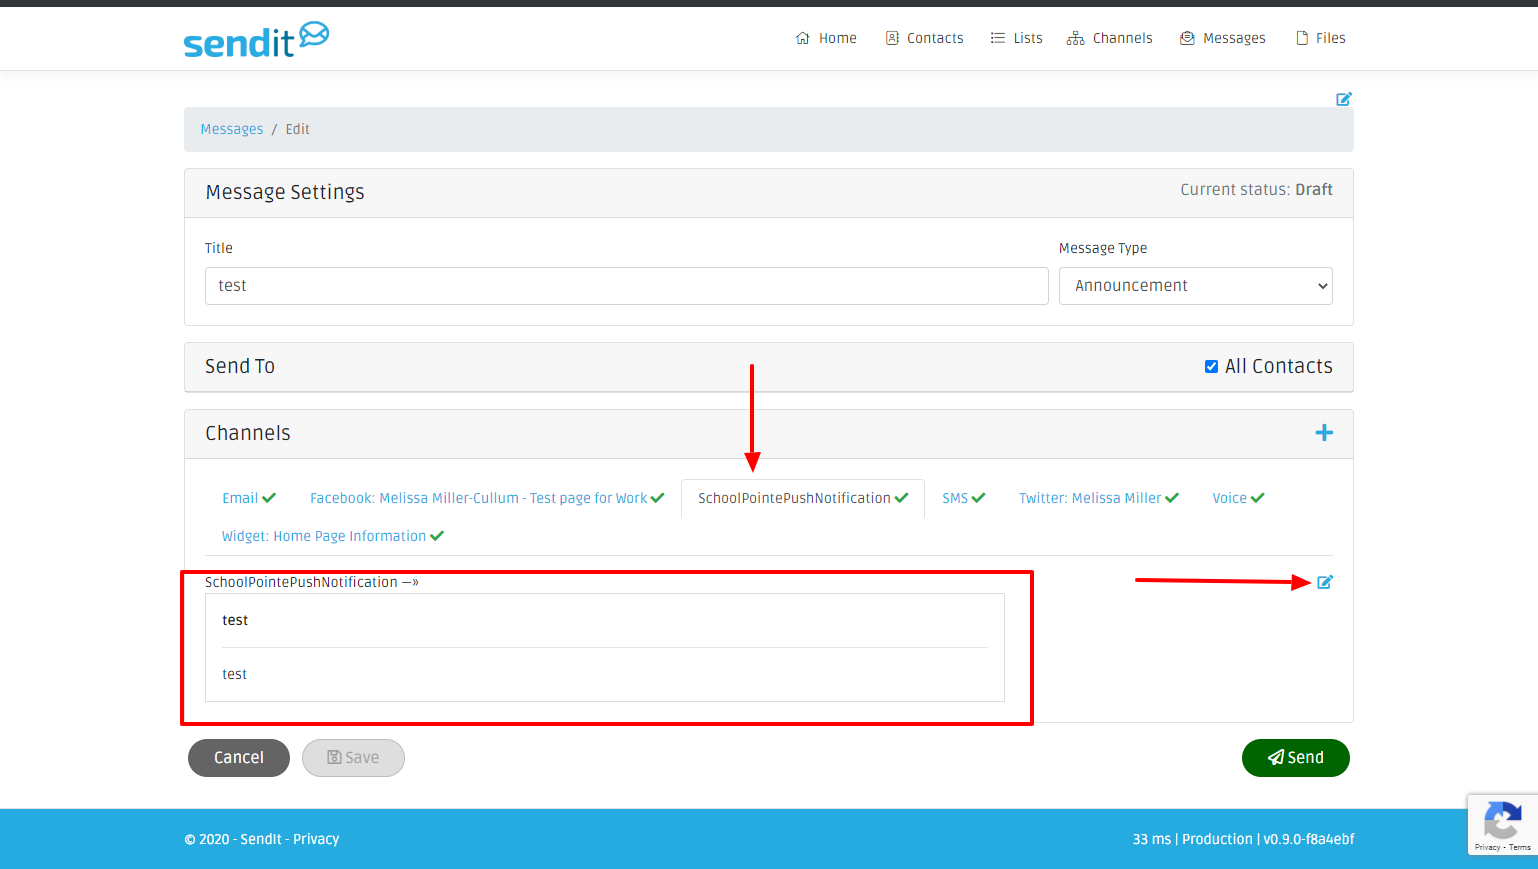
Push Notification:
Click on the add channels + button and select Push Notification, a new page will open asking for message details. Provide a title and then type the message you would like to send to the app. Then click save and close.
Editing a Channel/Message:
At any time you can edit a channel. To edit or fix and channel, click on the channel title. Here you can see the message information. To edit this click on the pencil icon.
Sending a Message:
First, make sure your channels are all set up properly. If at any time you see a red exclamation point next to a channel, that means something was not set up correctly. A green Check mark next to the channels mean that all fields were filled out properly.
Once Message Settings are selected, contact lists are selected and channels are added, you will have the option to Save this message. Once saved you can now send your message.
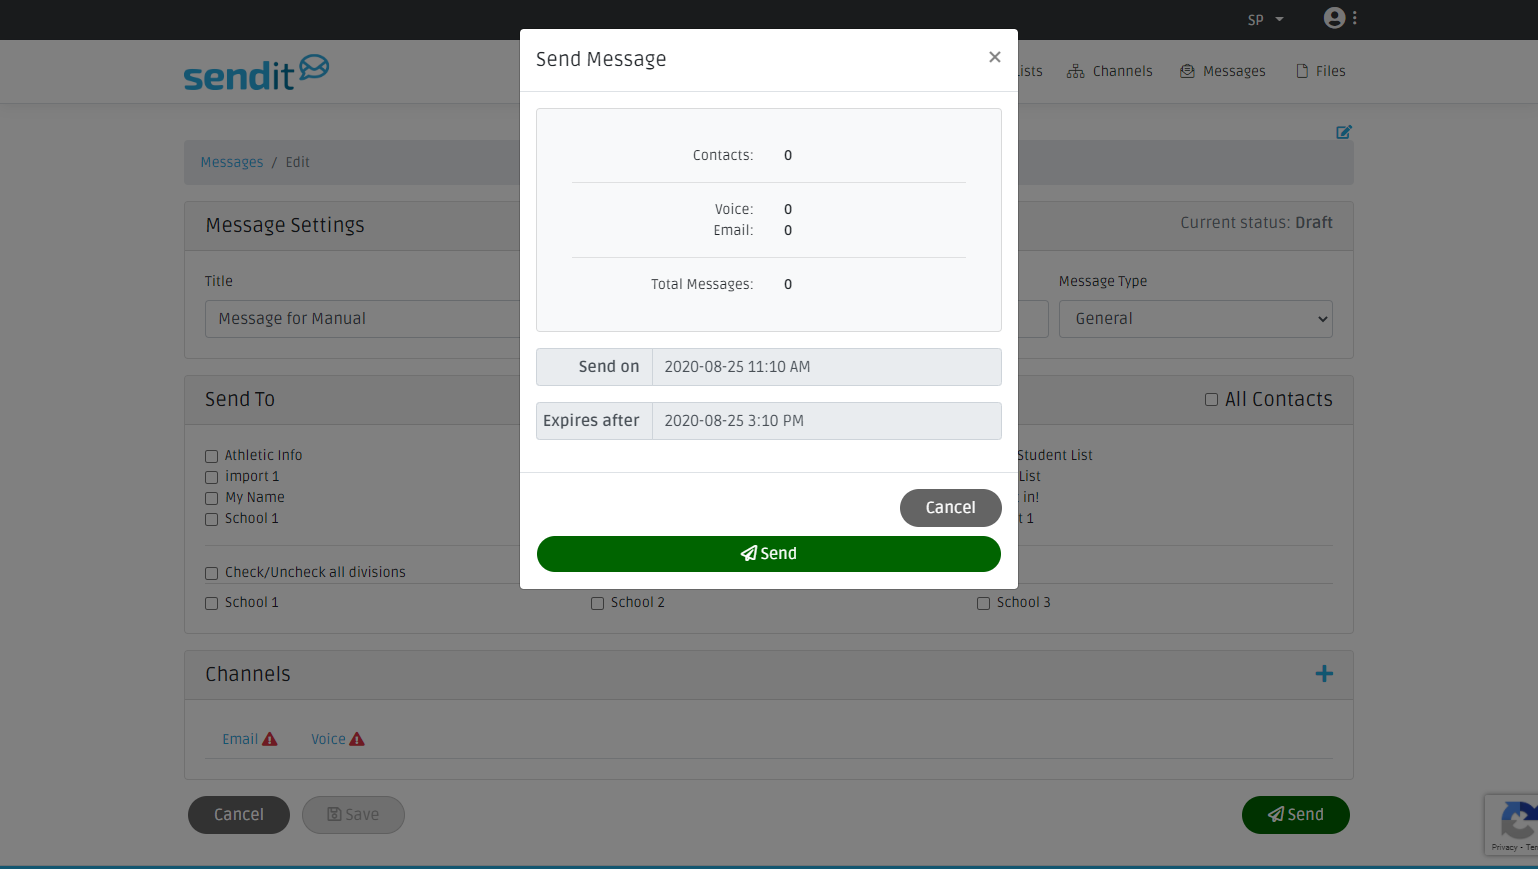
Click Send, the message information box will pop up telling you the number of contacts this message will send to. Here you can set the date/time you would like this message to send on. If you do not pick a specific date/time, the message will send right away. Then select an Expiration Date (needed for the Site Widget and App channels). Click Send.
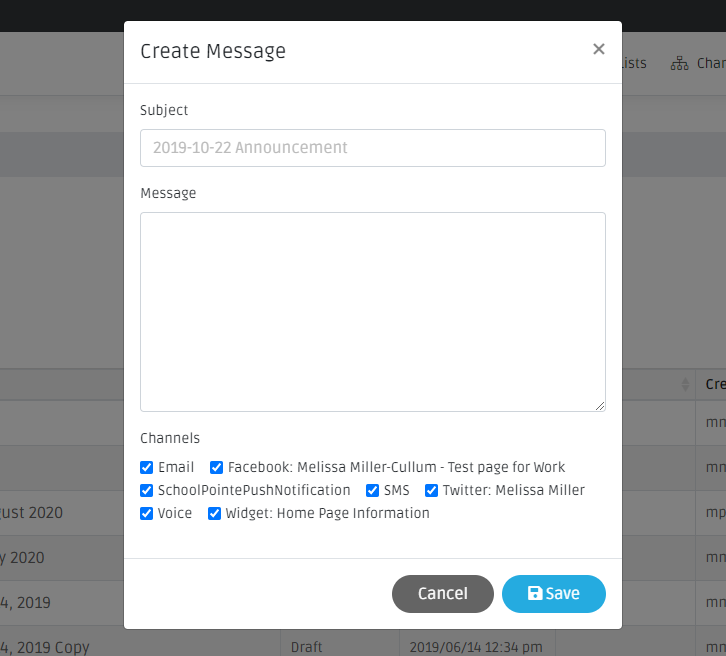
Quick Create Message:
This is great for emergency messages, or messages that have the same message and needs to go out right away. All channels are already selected and All Contacts are already selected. You can edit these fields if desired.
To send a Quick Create message, click Quick Create and provide the message a Subject and then type your message. If there is a channel you do not want to send this message to, uncheck that box. Click Save.
Once saved, the Message Settings page will show. If you would like to edit any of the Channel options, see the Editing a Channel/Message section of this manual. You can also uncheck the All contact and choose specific lists/divisions to send the message to if desired. When ready, click Send.
Comments
Please Sign in to leave a comment if you don't see the comment box below.