
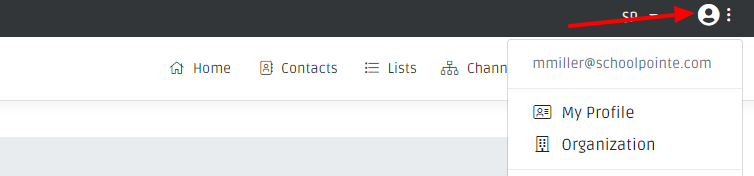
Click on the Profile Icon and select Organization.
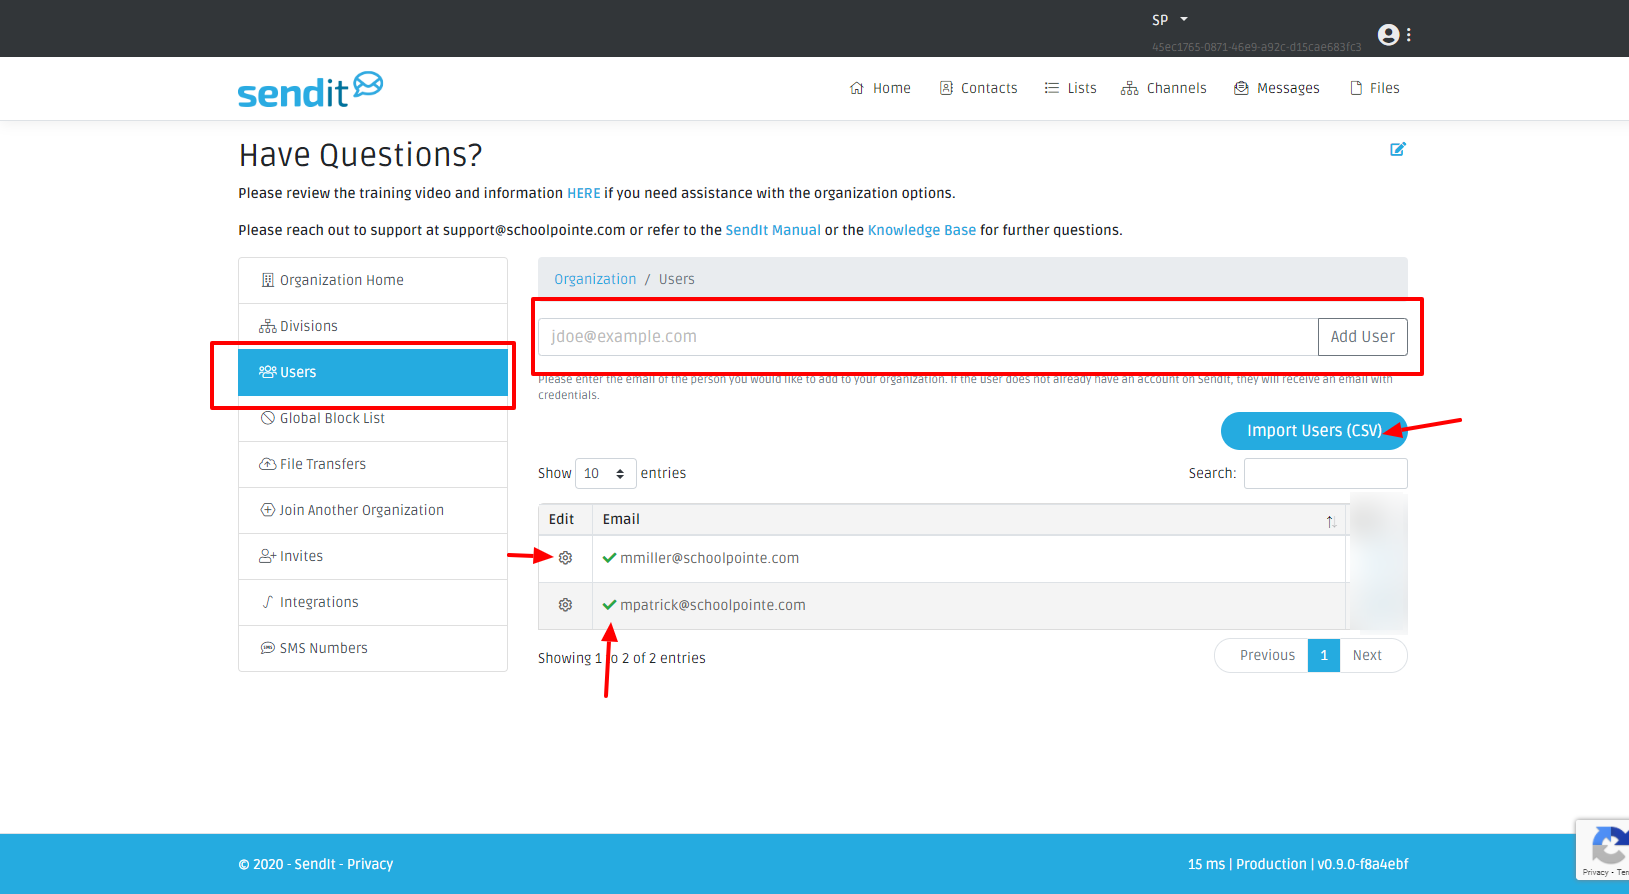
Select Users. This is where you add users and control users permissions. The users that are added here will be logging into SendIt to send messages, this is different from the general contact list (people receiving messages). To add a user, put that person’s email address in the space provided and click Add User. This will send that user an email with a link to SendIt and a temporary password.
You can also do a bulk import (csv) by clicking on the Import Users button. There is a specific format for this, Please upload a file with two columns and a header, the first column is the email address of the new user, and the second column is the division unique identifier. If not assigning a user to a division you can leave that field blank.
Email,DivisionId
user@example.org,0001
user1@example.org,0002
Once you have invited a user into your organization, you will see a green checkmark next to the users that have received the link and have logged in.
You can manage any users permissions, reset their password, or remove that person as a user by clicking on the Edit button next to their email. Select which divisions/lists you would like this person to have access to by checking the appropriate boxes and clicking save. To reset their password or remove them as a user, click on the grey options button in the top right section of the screen.
See the Permissions section to learn how to set permissions
Comments
Please Sign in to leave a comment if you don't see the comment box below.